 Simon Prickett

I realized I’ve written guides describing how to use the Low Voltage Labs traffic lights with the Raspberry Pi for Python (read Python article), Swift (read Swift article), Node RED (read Node RED article), Java (read Java article), C (read C article), Bash scripting (read Bash article), Go (read Go article), Rust, Arduino and .NET/C#, but never for Node.js. Node.js is a great environment for writing modern JavaScript on the Pi and has a huge ecosystem of off the shelf packages from npm that help you get things done without re-inventing wheels. Let’s take a look at how we can use it to control the traffic light LEDS…
To make this a standalone guide, there will be some re-use of content from the prior articles here.
Shopping List
To try this out, you will need the following (links here mostly go to Adafruit, UK customers may want to consider Pimoroni as a UK based alternative, Amazon has most if not all of this stuff too):
- A Raspberry Pi (I’ll use the Pi 3 Model B here, but any model with GPIO pins will work — if you want to use the Pi Zero you’ll need to solder some headers onto it). I’m going to assume you have a Pi 2 or 3 with 40 pins
- A power supply for your Pi (Raspberry Pi 4 requires a different USB C power supply)
- Some sort of case is probably a good idea to protect the Pi (but you’ll need to leave the lid off to expose the GPIO pins to connect your lights to)
- A Micro SD card to install your operating system on (or get one with the OS pre-installed). If you want to install the operating system yourself, you’ll need a Mac, PC, Linux machine with an SD card reader
- A set of traffic lights from Low Voltage Labs (the two pack is good value)
- Any USB keyboard to type on the Pi, you might want a mouse too
- Any HDMI display to show output from the Pi
Attaching the Traffic Lights
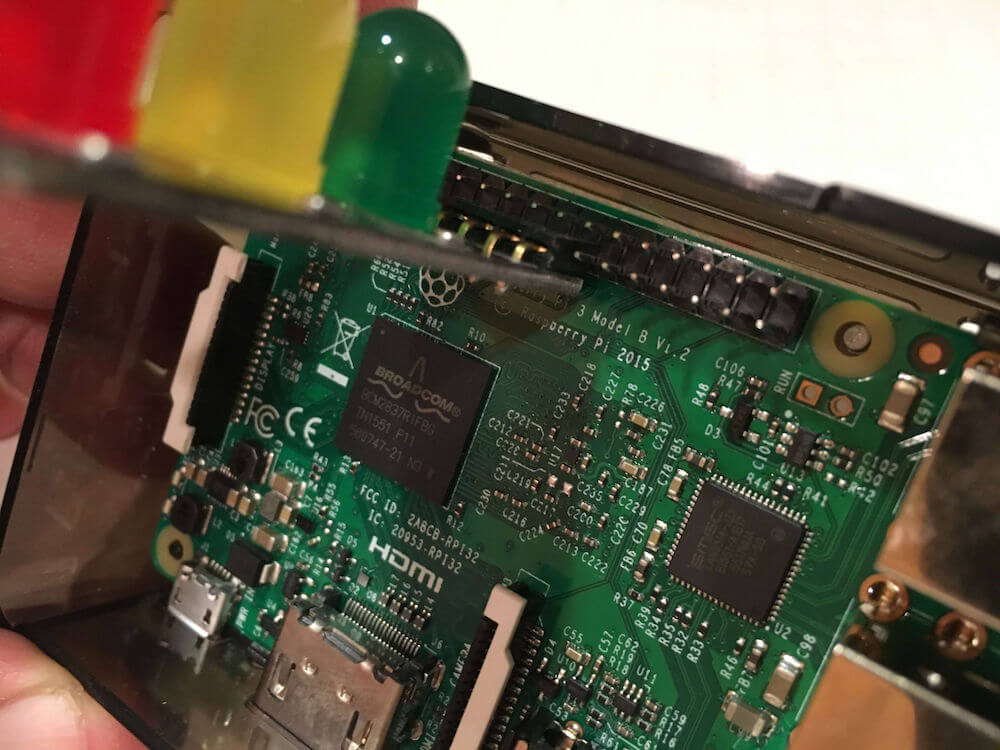
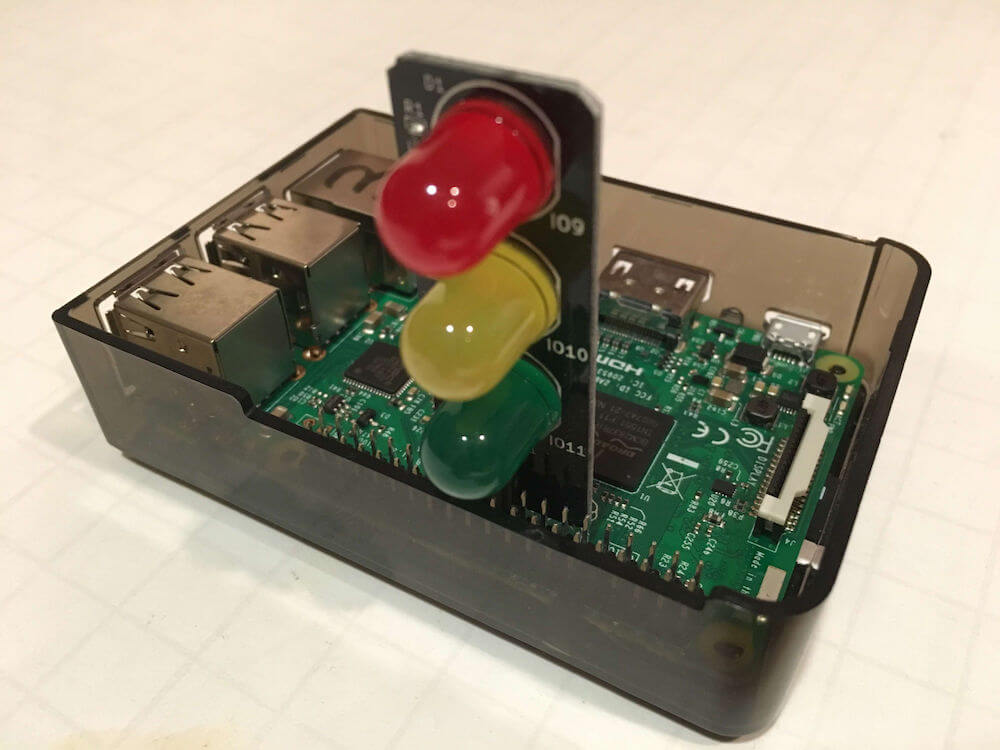
The Low Voltage Labs traffic lights connect to the Pi using four pins. One of these needs to be ground, the other three being actual GPIO pins used to control each of the individual LEDs.

Before powering up the Pi, attach the traffic lights so that the pins connect to the GPIO pins highlighted in red:

When you’re done it’s going to look something like this… (an easy way to make sure you have it right is to locate the lights on the left hand row of pins as you look at the Pi with the USB ports to the bottom, then count 8 pins up and attach the lights there).
Don’t turn the Pi on yet, you’ll need to prepare an operating system image for it first…
Operating System Setup
Install the Raspberry Pi OS which can be downloaded from the official Raspberry Pi site. You can also find an excellent installation guide there should you need help.
Once you’ve got the operating system installed, make sure you can login, and have a working wired or wifi internet connection.
Your support helps to fund future projects!
Now you can go ahead and start turning lights on and off!
Installing Node.js
The “Lite” Raspberry Pi OS doesn’t have Node.js pre-installed, as it is a minimal distribution. Let’s add an up to date version of Node.js from NodeSource:
$ curl -sL https://deb.nodesource.com/setup_10.x|sudo -E bash -
This will add a Node.js 10.x repo and update the package list. Once completed, we can then install Node.js (which also includes the npm package manager):
$ sudo apt-get install -y nodejs
We should now have an up to date Node.js and npm (your version numbers may differ):
$ node --version
v10.6.0

$ npm --version
6.1.0
Installing Dependencies
We’ll also need git, which isn’t installed with Raspbian Lite but is simple to add:
$ sudo apt-get install git
$ git --version

git version 2.11.0
Programming the Traffic Lights
To get going, grab my example code from GitHub, install module dependencies and start it up:
$ git clone https://github.com/simonprickett/nodepitrafficlights.git
$ cd nodepitrafficlights
$ npm install
$ npm start
If the lights are connected to the correct GPIO pins, they should start to flash on and off in the UK traffic light pattern (red, red + amber, green, amber, red). If you don’t see anything, make sure that you have the lights connected to the right pins.
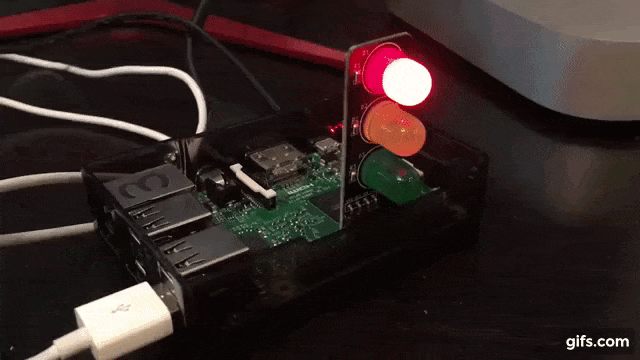
To exit, press Ctrl + C. This will cause all of the lights to turn off, and the program will exit.
How it Works
Here’s a brief walkthrough of the complete source code which uses async and await to help eliminate the traditional callback pyramid…
The first thing to do is require the onoff module, which handles interaction with the Pi’s GPIO pins. Lines 3–5 set up objects for each of the three lights, telling onoff which pin to use, and that they are to be used as outputs.
In order to make Node.js wait around for a configurable time before changing the state of the lines, we define a sleep function at line 7 that takes the desired sleep time in milliseconds as its parameter. This function returns a promise that is resolved after an appropriate wait period has expired.
Lines 13–37 defines an async function that loops forever and uses the onoff module’s writeSync function to turn each light on (1) or off (0) according to the desired stage of the traffic light sequence. At each stage, the sleep function is called to keep the lights in their current state for a period of time (2000 milliseconds = 2 seconds for example). sleep returns a promise, so we await its resolution.
Line 39–43 define a convenience function that will switch all of the lights off.
Lines 45–49 register a handler function to intercept the SIGINT signal… this signal is sent to the program whenever the user gets bored of watching the lights and hits Ctrl+C. The handler function turns all of the lights off and cleanly exits Node.js.
Finally line 51 ensures that we always start in the right state by switching all of the lights off, then invoking runLights which will run in a continuous loop until the user presses Ctrl+C, invoking the SIGINT handler.
Using async, await and promises, plus the synchronous functions provided by the onoff module makes the code much easier to read than it could have been, and avoids deeply nested callbacks.
The source code for this project is freely available on GitHub.
I’d love to hear what you’re up to with the Raspberry Pi — get in touch via the Contact page. If you enjoyed this article, please share it far and wide!
 Writing Google Cloud Functions with Python 3