 Simon Prickett

It’s been a long time coming, but I finally decided to produce a C#/.NET version of my original Raspberry Pi / Low Voltage Labs traffic lights Python article (read here).
To make this a standalone guide, there will be some re-use of content from the prior article here. Since writing this article, I’ve also written up the same exercise using Swift (Swift version), Node.js (read about that here), Node RED (try here), Java (try here), Bash scripting (Bash article), C (check it out here), Rust and also for Arduino.
When writing this article, I found Pete Gallagher’s “Install and use Microsoft .NET 5 with the Raspberry Pi” article (read here) very useful.
Shopping List
To try this out, you will need the following (links here mostly go to Adafruit, UK customers may want to consider Pimoroni as a UK based alternative, Amazon has most if not all of this stuff too):
- A Raspberry Pi (I’ll use the Pi 3 Model B here, but any model with GPIO pins will work — if you want to use the Pi Zero you’ll need to solder some headers onto it). I’m going to assume you have a Pi 2, 3 or 4 with 40 pins
- A power supply for your Pi (Raspberry Pi 4 requires a different USB C power supply)
- Some sort of case is probably a good idea to protect the Pi (but you’ll need to leave the lid off to expose the GPIO pins to connect your lights to)
- A Micro SD card to install your operating system on (or get one with the OS pre-installed). If you want to install the operating system yourself, you’ll need a Mac, PC, Linux machine with an SD card reader
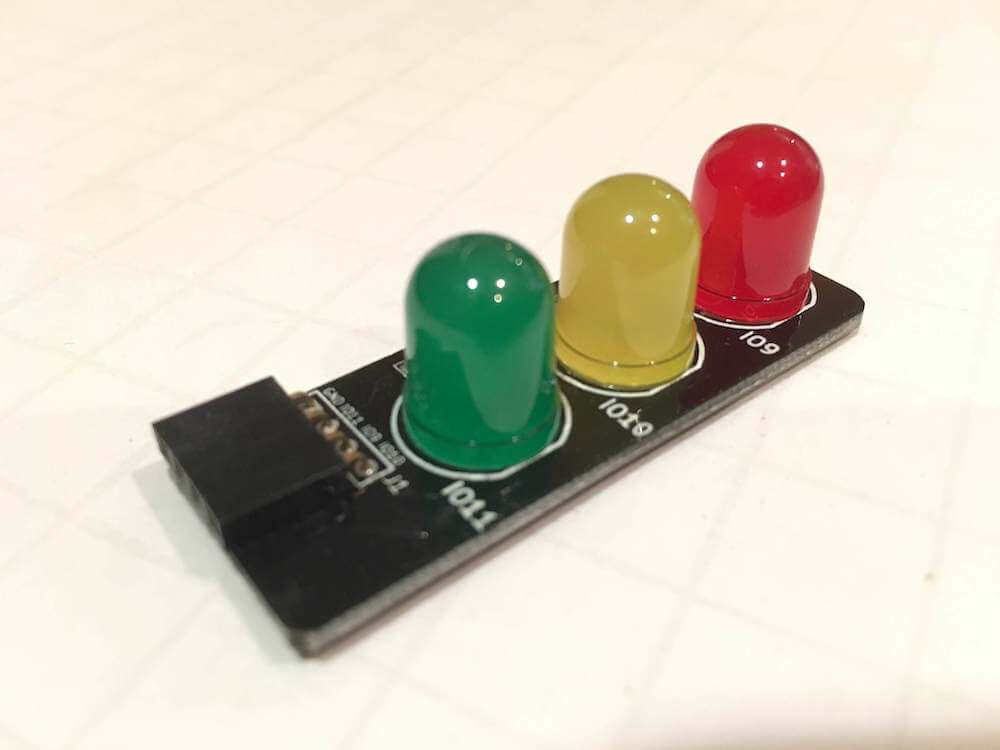
- A set of traffic lights from Low Voltage Labs (the two pack is good value)
- Any USB keyboard to type on the Pi, you might want a mouse too
- Any HDMI display to show output from the Pi
Attaching the Traffic Lights
The Low Voltage Labs traffic lights connect to the Pi using four pins. One of these needs to be ground, the other three being actual GPIO pins used to control each of the individual LEDs.
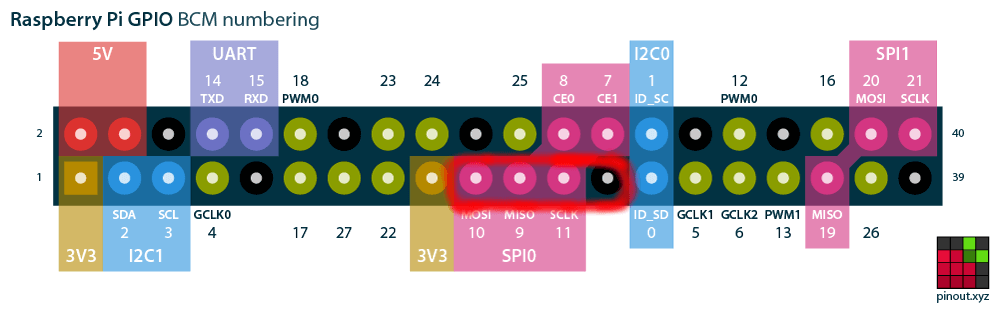
Before powering up the Pi, attach the traffic lights so that the pins connect to the GPIO pins highlighted in red:
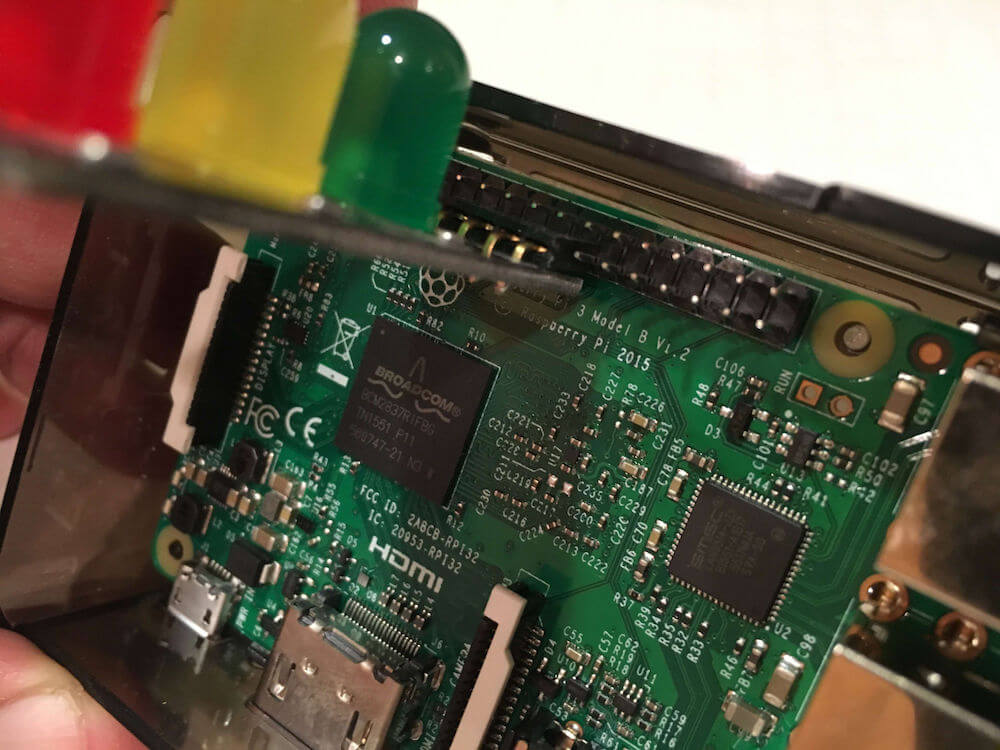
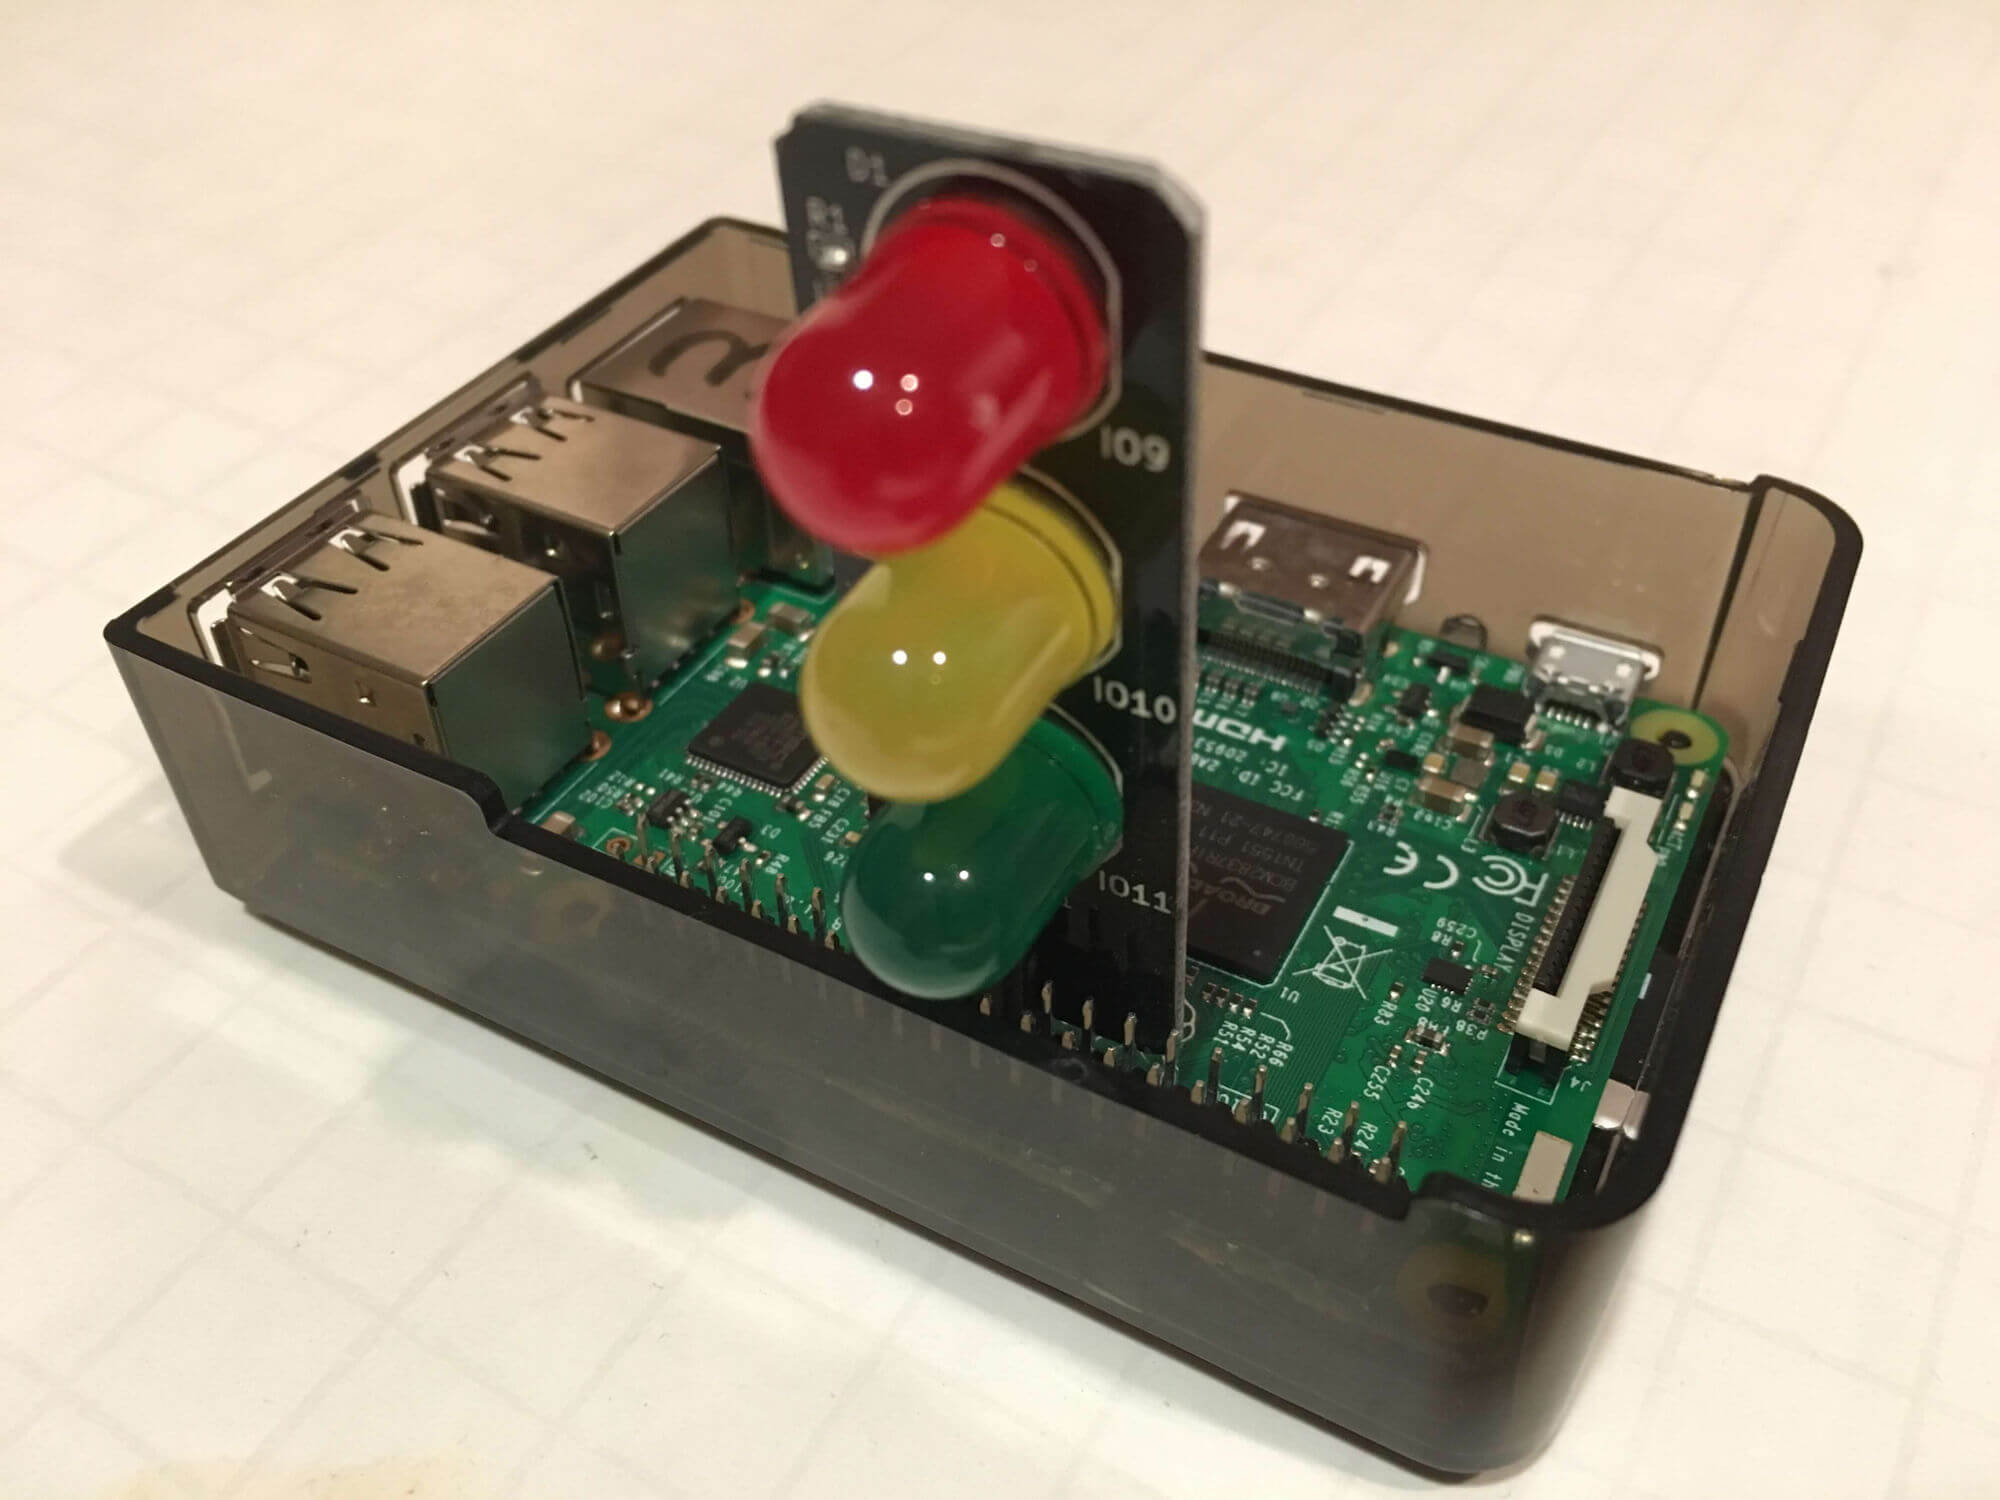
When you’re done it’s going to look something like this… (an easy way to make sure you have it right is to locate the lights on the left hand row of pins as you look at the Pi with the USB ports to the bottom, then count 8 pins up and attach the lights there).
Don’t turn the Pi on yet, you’ll need to prepare an operating system image for it first…
Operating System Setup
Install the Raspberry Pi OS which can be downloaded from the official Raspberry Pi site. You can also find an excellent installation guide there should you need help. As I didn’t need a full graphical desktop for this project, I went with the Lite version.
Once you’ve got the operating system installed, make sure you can login, and have a working wired or wifi internet connection.
Now you can go ahead and start turning lights on and off!
Your support helps to fund future projects!
Installing Dependencies
To get started, we’ll need to install some dependencies. These include git, plus some libraries that the .NET runtime requires:
$ sudo apt-get install git libunwind8 gettext apt-transport-https
$ git --version
git version 2.20.1
Installing the .NET SDK
Next, we’ll want to install the .NET SDK. I was using a Raspberry Pi 3, so needed the ARM 32 version of this. At the time of writing the latest version was 5.0.x, available from Microsoft here. The download command may vary if newer patches are available, but here’s what I used:
$ wget https://download.visualstudio.microsoft.com/download/pr/f456f253-db24-45ea-9c73-f507f93a8cd2/6efe7bed8639344d9c9afb8a46686c99/dotnet-sdk-5.0.302-linux-arm.tar.gz
Unzip the SDK (again, file name may vary if there’s a more recent release):
$ gunzip dotnet-sdk-5.0.302-linux-arm.tar.gz
Then install it:
$ sudo mkdir /opt/dotnet-5.0.302
$ sudo tar xf dotnet-sdk-5.0.302-linux-arm.tar -C /opt/dotnet-5.0.302
$ sudo ln -s /opt/dotnet-5.0.302 /opt/dotnet
$ sudo ln -s /opt/dotnet/dotnet /usr/local/bin/dotnet
Check that the SDK was installed correctly:
$ export DOTNET_ROOT=/opt/dotnet (add to ~/.bashrc if you like)
$ dotnet --version
5.0.302
To make sure that the DOTNET_ROOT environment variable is always set, you can optionally amend your .bashrc file (~/.bashrc) to set it:
$ echo "export DOTNET_ROOT=/opt/dotnet" >> ~/.bashrc
$ . ~/.bashrc
Programming the Traffic Lights
I’ve already created a .NET project and C# code for you, so we just need to get that from GitHub:
$ git clone https://github.com/simonprickett/dotnetpitrafficlights.git
$ cd dotnetpitrafficlights
Now add the package we need to control the Pi’s GPIO pins:
$ dotnet add package System.Device.Gpio
We’ve now got everything we need to start seeing some action, so let’s start it up:
$ dotnet run
If the lights are connected to the correct GPIO pins, they should start to flash on and off in the UK traffic light pattern (red, red + amber, green, amber, red). If you don’t see anything, make sure that you have the lights connected to the right pins.
To exit, press Ctrl + C. This will cause all of the lights to turn off, and the program will exit.
How it Works
Here’s a brief walkthrough of the complete source code…
Lines 1-3 declare which packages we’ll be using… we want System.Device.Gpio to control the Pi’s GPIO pins that the lights are connected to. We also use System.Threading to sleep for periods of time before changing the lights from one state to another.
Lines 11-13 declare some constants that map each of the lights to the GPIO pin number that it is connected to.
At line 15, we declare a new instance of the GpioController that we’ll use to set the values of the three GPIO pins. Lines 16-18 configure these pins as outputs as we have a light connected to each of them (we’d declare them as inputs if we had, say, a button connected).
The function allLightsOff at line 20 is a utility function that turns all three lights off, by writing the PinValue.Low value to them (see the System.Device.Gpio documentation).
At line 27, we add a key press listener so that when the user presses Ctrl-C to quit the program, all of the lights get turned off.
The main execution flow then begins at line 31 by first ensuring that all the lights are off. The code enters an infinite loop then adjusts the values of each light’s pin to be PinValue.High or PinValue.Low before calling Thread.Sleep() to wait an appropriate time before entering the next state.
Whenever the user’s done with the program and wants to quit back to the command line, they press Ctrl-C. This invokes the handler at line 27 and turns all of the lights off.
I’ve put the full source code on GitHub for your enjoyment.
Main Photo by Henrikas Mackevicius from Pexels.
I’d love to hear what you’re up to with the Raspberry Pi — get in touch via the Contact page. If you enjoyed this article, please share it far and wide!
 The M5Stack Core Ink Pomodoro Timer