 Simon Prickett

Let’s take a look at how to use a break beam sensor in a Python script on a Raspberry Pi! I’ve had a few of these kicking around for a while now, and finally got around to unboxing one the other day.
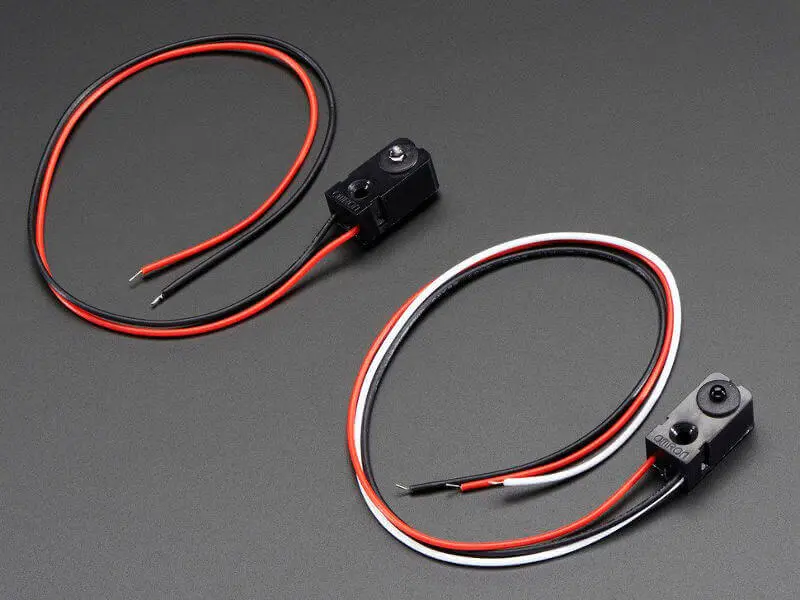
Break beam sensors detect objects crossing their line of “vision” using infrared. They come in two parts:
- The emitter: emits a beam of infrared light. It has two wires - one for power, the other for ground.
- The receiver: when pointed at the emitter, receives the beam of infrared. It has three wires - one for power, one for ground and the third is used for data.
Both emitter and receiver need to be connected to a 5v power source (Adafruit say 3.3v will also work but expect a shorter range), and you can use the same source for both if you want to. Both also need a ground connection, but they don’t have to share one.
The emitter and receiver work together so that when something passes between them breaking the infrared beam, an event occurs that your code can pick up and use. These events are detected by using the third wire on the receiver to connect to a GPIO pin on the Pi that is set as an input. From a setup and coding perspective, break beam sensors are a very similar sort of input to a button or the magnetic door sensors the I’ve written about before.
These sensors are pretty cheap, I got mine from Adafruit (product page here) for a couple of Dollars each. They sell them in various sizes - basically the bigger the size, the further apart you can place them and still expect them to work. I’d imagine that the larger ones also really do need 5v power rather than 3.3v, but I haven’t tried them.
Your support helps to fund future projects!
I’m going to use several of these sensors in a larger project in the future. For this post I’ll just run through how to wire one up to a Pi and how to write a basic Python script that fires events whenever the sensor state changes.
Wiring
I used a breadboard to wire the sensor to the Pi as follows:
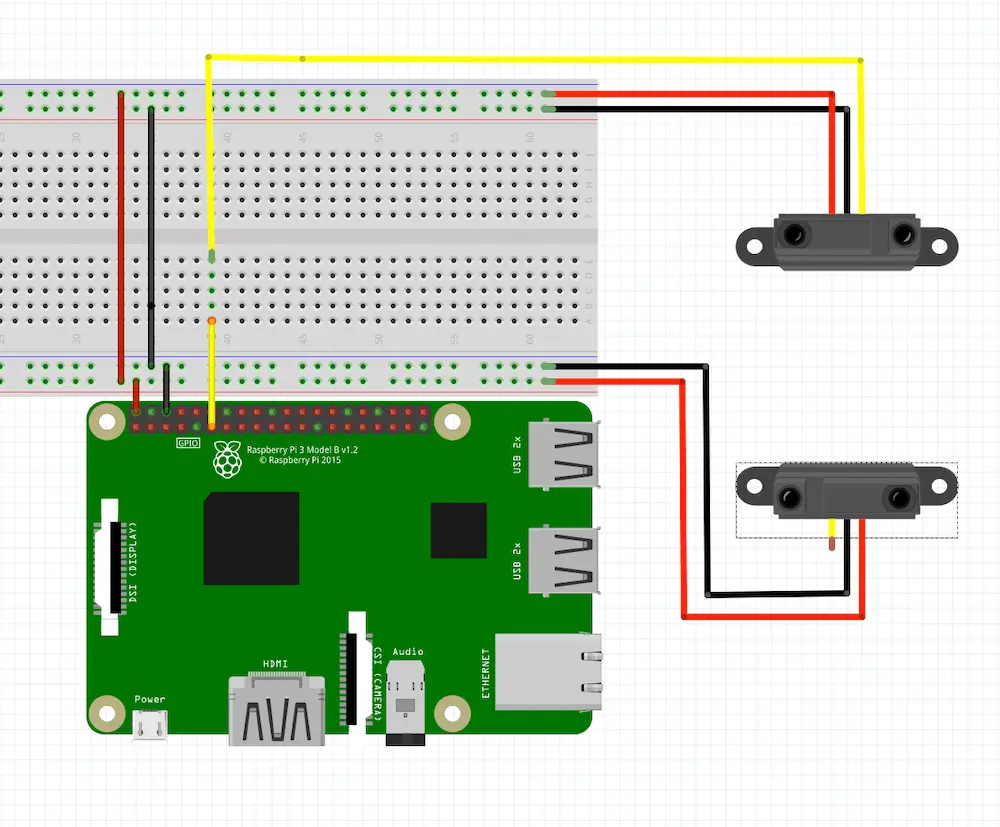
- The red wires on both the emitter and receiver are connected to 5v power pins on the Pi.
- The black wires on both the emitter and receiver are connected to ground pins on the Pi.
- The white wire on the receiver is connected to GPIO 17 on the Pi.
Software
I wrote a simple Python script to log whenever the sensor state changes…
The code breaks down into two parts, setup and event handling… setup first:
- At line 3, I set the GPIO pin number I have the receiver’s data wire connected to. I used 17, any available GPIO port would work.
- At line 11, the GPIO is set to Broadcom numbering mode.
- Line 12 configures GPIO 17 to be an input, with the pull up resistor turned on. If you’d like to know more about configuring GPIO pins with Python, SparkFun has a good guide.
- Line 13 tells the GPIO module that we want to run the function
break_beam_callbackwhenever GPIO 17’s state changes. - Line 15 stops the program from exiting until we’re done with it, by waiting for the user to press enter.
- If the user does press enter, we clean up the GPIO resources at line 16 before exiting.
The function that handles events from the sensor is called break_beam_callback and is defined at line 5. Here’s how it works:
- The function takes a parameter,
channel, that is unused in this instance, but required to make it work as a callback for the GPIO module’sadd_event_detectfunction. It contains the pin number of the GPIO pin that the event originated from. - Line 6 checks if pin 17 is high or low.
- If it is, line 7 executes and reports that the beam has been restored (something that was previously blocking the receiver’s view of the emitter has now gone).
- If pin 17 is low, line 9 executes and reports that the beam has been broken (something has just blocked the receiver’s view of the emitter).
That’s all there is to it!
Demo Time!
Here’s a quick demo video showing this setup in use to report when a car passes through the sensor… this is something I want to do more of in the larger project I’m working on, but more on that later!
Are you doing anything interesting with the Pi and sensors? If so, I’d love to hear about it. Get in touch via the Contact page.
(Main photo by David Anderson on Unsplash)
 Controlling Real World Objects with Raspberry Pi and Node.js