 Simon Prickett

“How can you store images in Redis from a Python script?” - I was asked this by someone looking to build an IoT project that used Redis as the data store for image classification. The really short answer is “Well, Redis Strings are binary safe, so any data structure in Redis that uses those can hold your image data safely”. That’s a bit boring though, and I’m always on the lookout for ideas for the Internet of Things live streams…
So I thought I’d build something that demonstrates how to get image data in and out of Redis. Making a command line utility to read or write JPG files is a bit dull and not the point of an IoT series… I decided to fish out a previously unused Raspberry Pi camera module that I’d had for some years and finally give it a go. A web front end to display images seemed like an obvious choice.
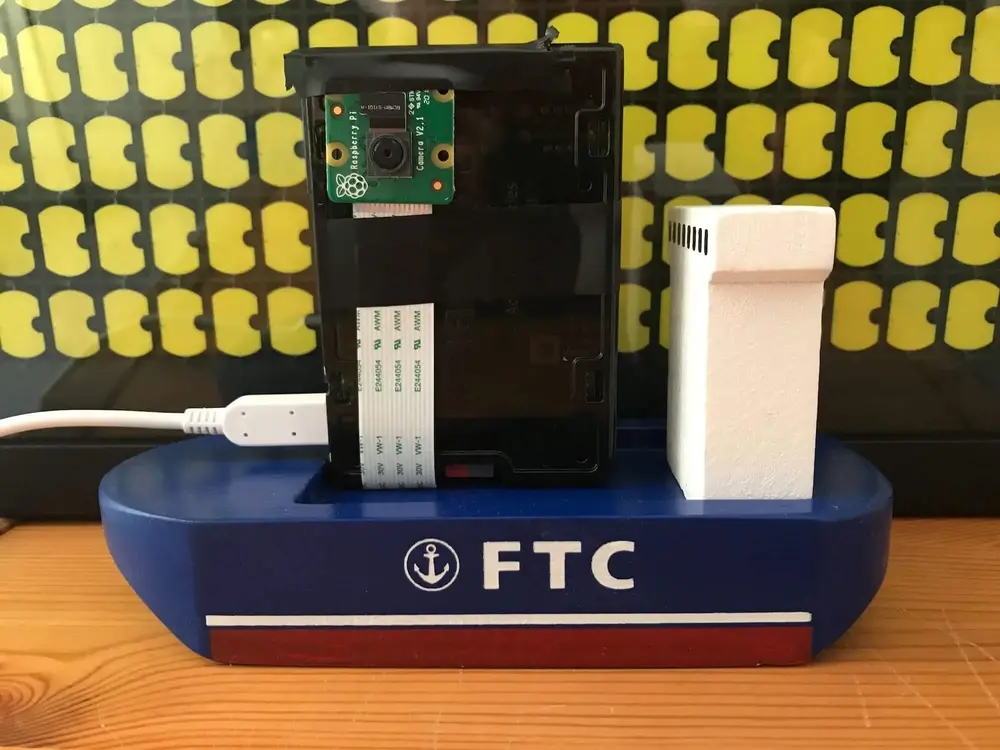
Here’s what my initial Raspberry Pi camera setup looked like. I used a Raspberry Pi 3B (I had one around, any model with the camera interface will work), the Raspberry Pi Camera Module 2.1 and a case from Adafruit. I held the camera onto the case using electrical tape. I’ve subsequently updated the code to use the newer Raspberry Pi Camera Module 3 which has autofocus and a higher resolution.
This was the ninth project in my Things on Thursdays IoT live streaming series. I aim to work on this some more and enhance it with search capabilities, sensors, ability to set time to live on an image and who knows what else! When I do I’ll be sure to make some more videos and update this article and the codebase.
Your support helps to fund future projects!
Here’s the video run through of the project that I did as a live stream in April 2023:
A full explanation of how the project works can be found by watching the video and/or reading the README files in the project’s GitHub repository. Here’s a high level overview…
Architecture
There’s essentially two parts to this that share data via a common Redis instance. I used Redis Stack in the cloud (sign up free) because I’ll want to use the search capability in a later phase of the project. If you prefer, you could absolutely use standard open source Redis for what’s described here. The free cloud version is OK at 30Mb of storage, but with images you’ll quickly burn through that. For the demo in the video I was running Redis Stack on a Mac with more RAM and I’ve provided a Docker Compose file for that in the project’s GitHub repository.
The components are:
- Image capture component: This is written in Python and runs on a Raspberry Pi with a camera module attached. It takes a new picture every so often and stores it, plus some basic metadata, in Redis. Python was the obvious implementation choice here as Raspberry Pi provides an excellent Python library for their camera modules.
- Front end component: This comprises a server written in Python using the Flask framework. It reads data from Redis and uses a HTML front end to display it in a grid view. It uses HTML, JavaScript and the Bulma framework. These were all arbitrary choices - this component could equally be built with Node.js and Express for example.
Let’s look at each in turn.
Capturing Images with the Raspberry Pi and Storing them in Redis
This is the fun part with the hardware :) One of the great things about Raspberry Pi products is that they have excellent documentation and software support: the camera module is no exception. Python is the obvious choice of language when working on a Raspberry Pi, support for working with the GPIO pins and other peripherals is excellent. The Raspberry Pi Foundation provide a library called PiCamera2 which simplifies working with their camera modules.
I decided to make the simplest possible image capture script… instead of a button, sensor, or some other event triggering the capture of an image I’m just doing it on a timer loop. So a new image gets captured every 10 seconds or so. In a fancier demo, this could be configurable.
Every time the camera takes a picture, I’m storing it in a Python BytesIO in memory binary stream rather than as a file stored on the filesystem. I’m doing this because I want to persist the image data to Redis, and for that I need a binary representation that can be converted to a bytes object. The BytesIO object does that with its getvalue() method.
As we’re capturing multiple data items for each image, it makes sense to store them in a single Redis key. I chose to use Redis Hashes for this - a Hash is a flat map of name/value pairs stored at a single Redis key. As each value is a (binary safe) Redis String, we can put the bytes representing the image in there without worrying about data corruption. A Hash is also a good choice for futureproofing, as I want to add a search index over the image data in future and the Redis Stack search capability can do this for data stored as Hashes or JSON.
I chose to use the timestamp that the image was created at as part of the Redis key, so each image is stored in its own key named image:<timestamp> for example image:1681843615. At that key, I’m storing name/value pairs containing the image data, the timestamp, the Lux value that the camera captures and the MIME type of the image – the front end will need that to render it properly.
Here’s a complete example, with the image data truncated for brevity:
> HGETALL image:1681843615
1) "mime_type"
2) "image/jpeg"
3) "timestamp"
4) "1681843615"
5) "lux"
6) "268"
7) "image_data"
8) "\xff\xd8\xff\xe0\x00\x10JFIF\x00\x01\x01\x00\x00...
The Raspberry Pi Camera Module 2.1 captures images at a maximum resolution of 3280x2464 pixels. At this resolution you can expect each Hash to require around 2Mb of RAM in Redis. The v3 camera works at a resolution of 4708x2592 pixels.
Check out the complete source code for the image capture component in capture.py here on GitHub. There’s also a more detailed explanation of how the code works in the component’s README file.
In a future live stream I’d like to add one or more sensors to the Raspberry Pi and use them to trigger the camera. Rather than a picture being taken every so many seconds, the Pi would respond to events such as a button press or a noise… depending on which sensors I choose to use. I might be able to use the sensor to generate additional metadata… for example capturing some idea of the magnitude of a noise that triggered the sensor.
To keep the amount of data generated under control I set each image’s Hash to expire in Redis after a configurable amount of time.
Displaying the Images with a Web Front End
I’m terrible at CSS, so I always use a lightweight framework when making a web front end. I nearly always go with Bulma as there’s no build step needed and it’s really well documented - allowing me to get on with building stuff and not wasting time on the minutiae of layout.
There are two components to the “front end” - a HTML/CSS/JavaScript interface to display the images and their metadata in the browser, and a server that handles talking to Redis to get the data/images when the JavaScript running in the browser asks for them. This is a simple project, so I didn’t feel the need for a JavaScript framework. For the server, I chose Python and the Flask framework as it’s simple to use and many of you may already be familiar with it.
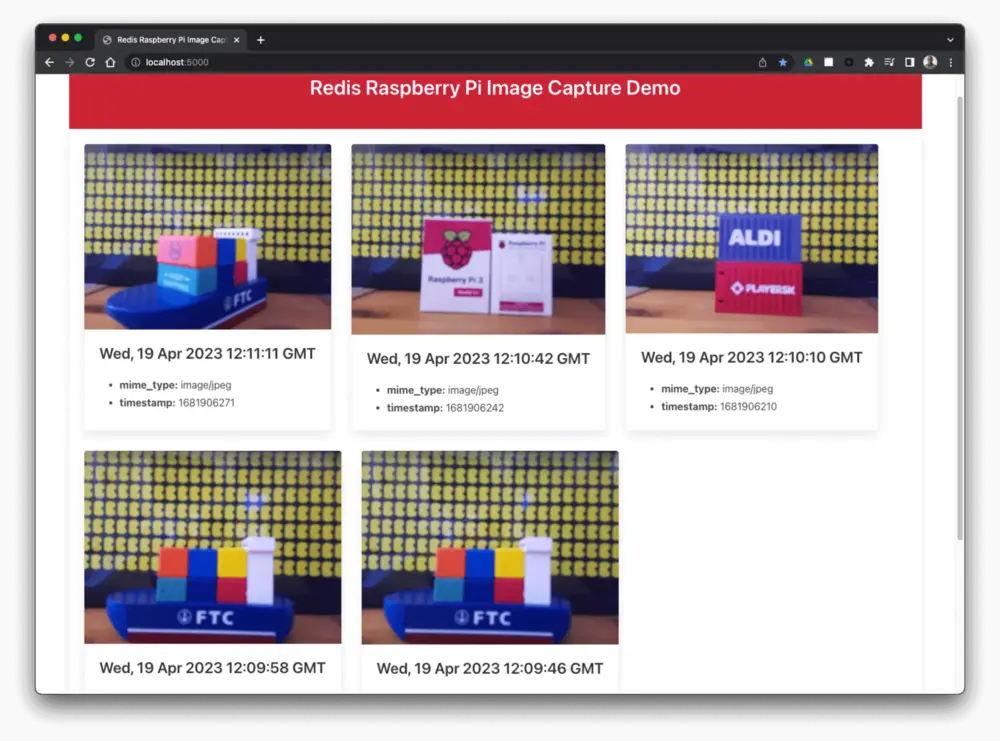
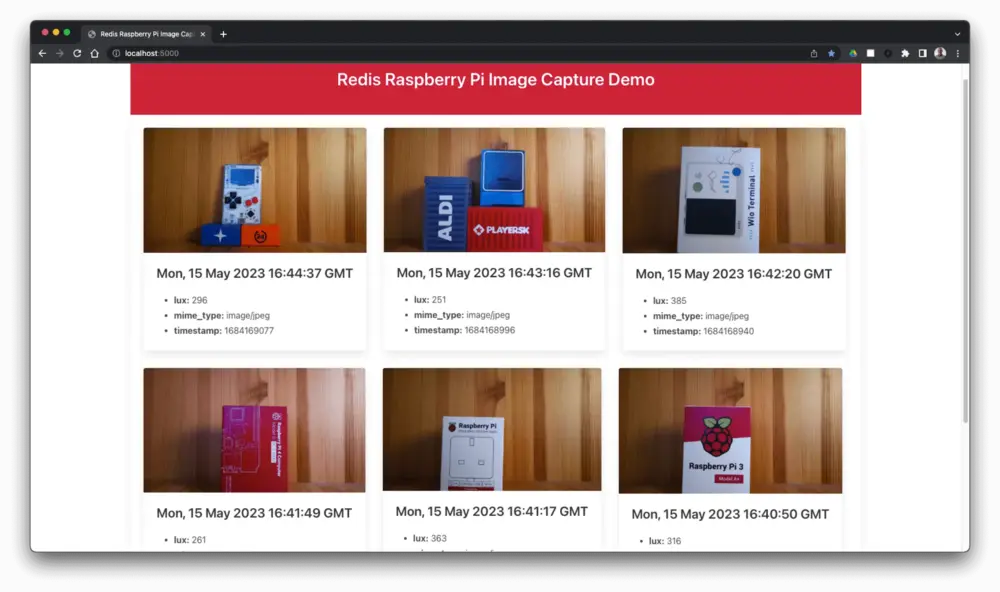
Here’s a couple of screenshots of the finished front end showing a few images captured from the Pi. These show the difference between the v2.1 and v3 camera modules.
As this was a basic demo to prove that the image data could go into and out of Redis safely, I didn’t build any pagination or clever lazy load features into the front end or Flask server. I might add those later as part of future live streams - using Redis Stack’s Search capability would also open up a lot of options here.
The server is a straightforward Flask application that opens a connection to Redis using the redis-py client library. It connects to Redis like this:
redis_client = redis.from_url(os.getenv("REDIS_URL", "redis://localhost:6379"))
I’ve chosen to configure the Redis client not to decode the bytes responses from Redis (by omitting decode_responses=True from my Redis connection URL). This is because we’ll need to read the raw image data stored in Redis without decoding. So whenever we read String data from Redis (everything that isn’t the raw image data), we will need to decode it back to a UTF-8 representation using .decode("utf-8") and you will see this throughout the code.
The Flask server serves up the HTML and JavaScript files for the front end (there’s no CSS file in the repository - the HTML file pulls in Bulma’s CSS from a third party CDN). The Flask server has three other routes, each of which deal with getting different data from Redis. They are:
- Get a JSON array of all image keys in Redis, ordered by timestamp so that the most recent image comes first. In this version of the application, this uses the Redis
SCANcommand. That’s OK but could be better - it’s one of the things I want to upgrade to use the Redis Stack Search capability in future. - Get the metadata (everything except the actual image bytes) for a particular image from Redis. This route accepts a timestamp and uses it with the Redis
HMGETcommand to retrieve data from Redis, returning it as a JSON object. - Get the image for a given timestamp. This route retrieves the raw image data from a Hash in Redis, and returns it to the front end in a response whose
Content-Typeheader is set to the image’s mime type. The image data isn’t decoded to a String in Python, it’s kept as raw bytes.
The web front end is pretty simple - the layout is set out in the HTML file which loads logic contained in a single JavaScript file and executes it on page load. This makes a fetch request to the Flask application to get the array of all the image timestamps, then loops over this adding additional HTML to the page that describes a Bulma Card component for each image.
The image’s metadata is retrieved from the Flask application and displayed as an unordered list. I’ve used a regular <img> tag to display the image - the src URL gets set to the URL for the Flask application route that returns image data. The browser then requests that URL and Flask gets the data from Redis, returning it as what the browser sees as a static image file.
This approach will get slow and unwieldy with a lot of images, which is why I want to enhance it in future. As is, it’s a good example of how to get the image data into and out of Redis without overcomplicating things.
Check out the full server/front end code here, there’s also a more detailed description of how it works in the component’s README file.
What’s Next?
I’m aiming to use a forthcoming live stream to replace the use of SCAN with the Search capability of Redis Stack… check it out on YouTube:
I’ve also got a third episode scheduled for June 1st - here I’ll try and add a trigger sensor to the capture component and build out some more search functionality in the front end. Subscribe to get notified when it’s live:
Try it Yourself!
If you have a Pi and a camera module, this project should be fairly simple to set up and get running on your own hardware. I’ve made the source code available on GitHub, feel free to use is for whatever you like! I’ve provided instructions for how to set up each component and get a Redis instance in the cloud or using Docker.
I’d love to see what you make, drop me a line if you come up with something new.
Main photograph NASA Sofia Boeing 747SP Telescope from Wallpaper Flare.
 Geodesic Lines with the Google Maps Geometry API