 Simon Prickett

A major benefit of using Apache Cordova to build apps is that it provides a “write once, run many” solution to reusing application logic and design across the mobile platforms that it supports.
(This article originally appeared on the Modus Create blog).
This is great if we want to build an app that has pretty much the same layout, look, feel and functionality on all target platforms. However, this isn’t always what we want to do as each platform has its own idioms and norms that users will expect our app to conform to, or we may wish to use platform specific color schemes, text or graphics for other reasons.
Many front end JavaScript frameworks (examples: Ionic Framework, Sencha Touch) include some level of theming ability that helps with this, and this is a route that many developers take when faced with this problem. Other options could include adding Cordova’s Device Plugin to the project and placing platform specific code throughout the application, which is less than ideal for non-trivial use cases.
The Cordova CLI provides an often overlooked mechanism to help here, called merges. This feature works irrespective of the front end JavaScript framework we choose for our project, as it is built into the Cordova tooling itself. It works by merging a set of platform specific resources (which could be any combination of CSS, JavaScript, images, JSON files, etc) with the contents of our project’s www folder when building for each platform.
Let’s take a look at how this works, by modifying the Cordova boilerplate / “Hello World” app to specialize it for different platforms.
Your support helps to fund future projects!
For this example, we’ll be using Cordova 6 on a Mac with the latest Xcode and Android SDKs installed. If you want to follow along and need to set these up on your machine, the Cordova documentation has excellent instructions for this.
Creating a Boilerplate Cordova App
To begin, we’ll need to create a boilerplate Cordova app for iOS and Android. This is very simple to do using the terminal and Cordova CLI:
$ cordova create testapp com.moduscreate.testapp TestApp
$ cd testapp
$ cordova platform add ios android --save
Once this completes, we should see a top level app directory structure and config.xml file:
$ ls -lF
Should output something similar to:
total 8
-rw-r--r-- 1 simon staff 1071 Mar 17 21:47 config.xml
drwxr-xr-x 3 simon staff  102 Mar 17 21:47 hooks/
drwxr-xr-x 5 simon staff  170 Mar 17 21:47 platforms/
drwxr-xr-x 6 simon staff  204 Mar 17 21:47 plugins/
drwxr-xr-x 6 simon staff  204 Mar 17 21:47 www/
Scope of our Demo App
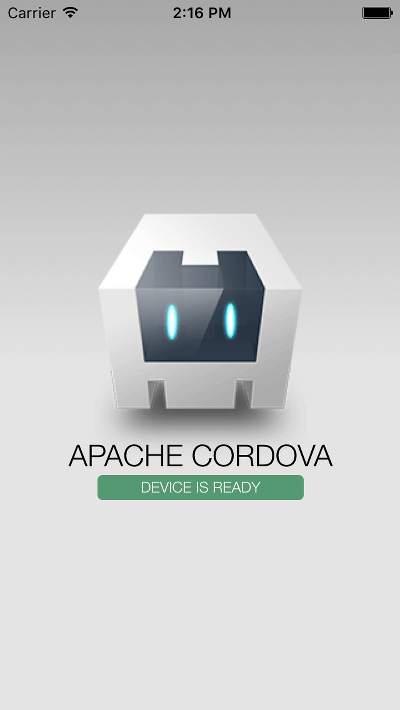
If we were to immediately build the boilerplate app that the Cordova CLI created for us, it would look like this on both iOS and Android:
To demonstrate how to use merges in Cordova, we’ll change the boilerplate app by making the following changes:
- Change the background color of the “DEVICE IS READY” area with platform specific CSS.
- Change the “APACHE CORDOVA” message using platform specific JavaScript.
- Change the Cordova logo image by adding platform specific image files.
We could achieve all of this using the Cordova Device plugin, some extra CSS classes in the existing boilerplate CSS file, and by adding a sprinking of code similar to the following:
if (device.platform === 'Android') {
  // Android specific code
} else {
  // iOS specific, assuming we are only supporting iOS
}
This is unnecessary, and wouldn’t scale well if we added more platforms: we would need to use switch statements with one case per supported platform, potentially in multiple locations in the app’s code. This is where the concept of merges comes into play.
Working with Merges
Merges provide a more elegant way of specializing our app’s look, feel and behavior on a per-platform basis, without polluting the app’s JavaScript code.
The concept is simple — Cordova’s CLI knows to look for a top level project directory called merges (in the same directory as config.xml). Inside merges, the CLI will look for a directory having the same name as the platform that is being built (android, ios, etc). The directory structure inside merges/<platformname> should then mirror that of our application’s www folder for files that we wish to replace with platform specific equivalents during a build. We are also free to add new platform specific files by creating new paths and/or files in merges/<platformname> that don’t exist in www.
The CLI will place the result of merging our app’s www and merges/<platformname> directory trees into the platform specific www folder for the platform that we are building. For Android this is:
platforms/android/assets/www/...
And for iOS it is:
platforms/ios/www/...
This is best explored by example so let’s change up our boilerplate app as described earlier, by swapping out some of the default CSS, JavaScript and images with platform specific versions.
By default the Cordova CLI no longer creates a merges top level directory when creating a new project. Let’s make one with subdirectories for each platform that our app supports, and mirror the boilerplate app’s directory structure in each:
$ mkdir -p merges/{android,ios}/{css,js,img}
Now check that we have the structure we expect:
$ find merges
which should output:
merges
merges/android
merges/android/css
merges/android/img
merges/android/js
merges/ios
merges/ios/css
merges/ios/img
merges/ios/js
Now we’ll need to add some platform specific content into each of the “leaves” of this new directory structure.
Merges for the Android Platform
In order to specialize our app when run on Android, let’s go ahead and add some Android specific CSS.
To make sure this only appears on Android, we’ll need to create a new file, platform.css at:
merges/android/css/platform.css
In which we will override some of the styles for the default Cordova app:
/* This is Android platform.css */
.event.received {
  background-color: #FF0000;
}
The above will change the background color of the “DEVICE READY” area to be red once the deviceready event has fired.
We will set the “APACHE CORDOVA” text to something platform specific by having the app’s JavaScript pull from a common object that each platform will implement differently. To do this, let’s create merges/android/js/platform.js containing the following:
/* This is Android platform.js */
var platformConstants = {
  appFullName: 'Modus Create for Android'
}
Then finally, we’ll introduce a new image to replace the boilerplate logo.png, by saving the following to merges/android/img/logo.png:

Merges for the iOS Platform
We now need to repeat the process that we just completed for merges/android in merges/ios. For iOS we’ll make the “DEVICE READY” background blue by adding merges/ios/css/platforms.css containing:
/* This is iOS platform.css */
.event.received {
  background-color: #0000FF;
}
And we’ll implement the same JavaScript object with the same key name as we did for Android, only with a different value by adding merges/ios/js/platform.js which contains:
/* This is iOS platform.js */
var platformConstants = {
  appFullName: 'iOS App by Modus Create'
}
Finally, we’ll add an iOS specific logo image as merges/ios/img/logo.png:

This completes the setup of the merges directory tree. Our directory structure should now look like this:
$ find merges
Output:
merges
merges/android
merges/android/css
merges/android/css/platform.css
merges/android/img
merges/android/img/logo.png
merges/android/js
merges/android/js/platform.js
merges/ios
merges/ios/css
merges/ios/css/platform.css
merges/ios/img
merges/ios/img/logo.png
merges/ios/js
merges/ios/js/platform.js
Next we need to update our app to reference the new files, and provide default implementations in case we want to run the app in a browser, outside of Cordova. As it stands right now, we would get a file loading error in a browser console, because there’s no platform.css or platform.js in the www folder so opening www/index.html with a browser will cause some issues.
Adapting the Cordova Boilerplate App
Before we can build and test our new platform specific CSS, JavaScript and images, we need to make a couple of changes to the boilerplate app that Cordova generated to use our newly created merge files.
As we’re introducing a new CSS file, we need to edit www/index.html and link to that stylesheet in the <head> of the HTML document:
<head>
  ...
  <link rel="stylesheet" type="text/css" href="css/index.css">
  <!-- Added to demonstrate merges -->
  <link rel="stylesheet" type="text/css" href="css/platform.css">
  ...
</head>
Also in www/index.html, we’ll need to add an id attribute to the h1 element that displays the “APACHE CORDOVA” text, so that we can target it with JavaScript to change it to something platform specific. We need to change:
<h1>Apache Cordova</h1>
to be:
<!-- Added id, deleted content to demonstrate merges -->
<h1 id="appFullName"></h1>
Then towards the bottom of the file, we need to include a <script> tag to load our new JavaScript file:
...
<script type="text/javascript" src="cordova.js"></script>
<!-- Following line added to demonstrate merges -->
<script type="text/javascript" src="js/platform.js"></script>
<script type="text/javascript" src="js/index.js"></script>
...
We’re done with changes to index.html at this point, so let’s save that and move on to editing the boilerplate JavaScript file js/index.js. Here we just need to change the initialize function to pull a platform specific string from our “platform.js” file and display it:
initialize: function() {
  /* Added following line to demonstrate merges. */
  document
    .getElementById('appFullName')
    .innerHTML = platformConstants.appFullName;
  this.bindEvents();
}
For completeness, let’s also make this work in a browser environment… for this we’ll leave the original Cordova robot image in place, keep the original “DEVICE IS READY” background color, and set our title message to “MODUS CREATE WEB APP”.
We’ll need to add a new file www/css/platform.css to the project, so that the browser has something to load when not running on iOS and Android. We can leave this blank, or just put a comment in it like so:
/*
 www/css/platform.css will be replaced with:
 merges/<platform>/css/platform.css when built on iOS or Android
*/
We also need to add www/js/platform.js which will need to declare our object containing the key that we reference in www/js/app.js on startup. So, www/js/platform.js should contain:
/* This is the default platform.js */
var platformConstants = {
  appFullName: 'Modus Create Web App'
}
Having made those changes, we can use the Cordova CLI at the terminal to add the browser platform to our test app:
$ cordova platform add browser --save
Our app’s now ready to test on iOS, Android and in the browser!
Building and Testing the App
We can go ahead and build our app for all platforms with a single command:
$ cordova build
Once that completes, let’s check that our files from the merges directory were copied into each platform correctly:
find . -name "platform.*" -o -name "logo.png"
Whose output should be:
./merges/android/css/platform.css
./merges/android/img/logo.png
./merges/android/js/platform.js
./merges/ios/css/platform.css
./merges/ios/img/logo.png
./merges/ios/js/platform.js
./platforms/android/assets/www/cordova-js-src/platform.js
./platforms/android/assets/www/css/platform.css
./platforms/android/assets/www/img/logo.png
./platforms/android/assets/www/js/platform.js
./platforms/android/platform_www/cordova-js-src/platform.js
./platforms/browser/cordova/node_modules/cordova-serve/src/platform.js
./platforms/browser/platform_www/cordova-js-src/platform.js
./platforms/browser/www/cordova-js-src/platform.js
./platforms/browser/www/css/platform.css
./platforms/browser/www/img/logo.png
./platforms/browser/www/js/platform.js
./platforms/ios/platform_www/cordova-js-src/platform.js
./platforms/ios/www/cordova-js-src/platform.js
./platforms/ios/www/css/platform.css
./platforms/ios/www/img/logo.png
./platforms/ios/www/js/platform.js
./www/css/platform.css
./www/img/logo.png
./www/js/platform.js
As we can see, files from the merges top level directory were copied to their respective paths in each of platforms/browser/www, platforms/android/assets/www and platforms/ios/www.
The final step is to run the native app in the emulators:
$ cordova emulate ios
$ cordova emulate android
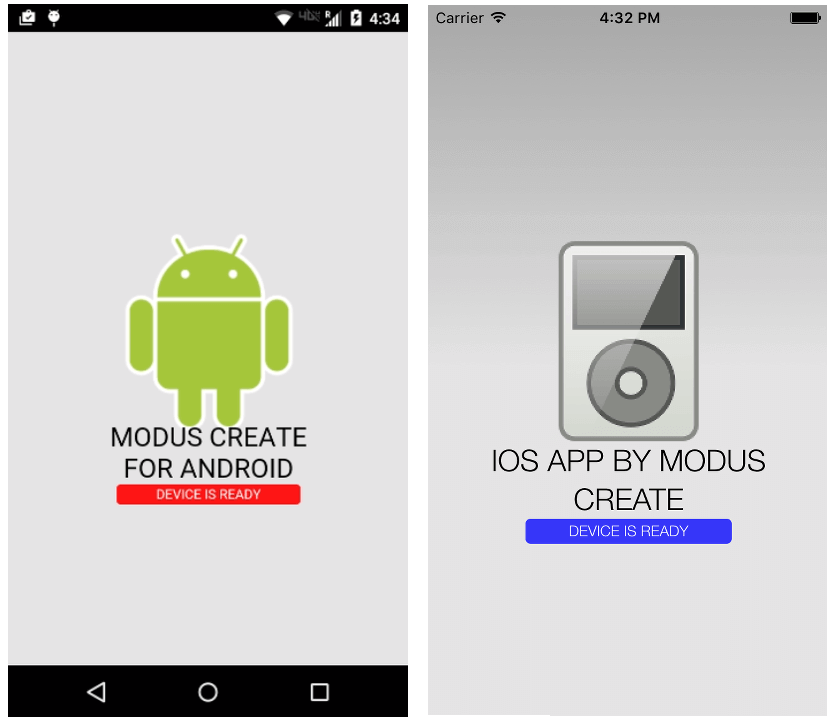
If everything has worked correctly, we should see customized “DEVICE READY” coloring, text string and image for each platform as shown below.
To test the browser implementation, we use the command:
$ cordova run browser
Which should open up the browser implementation at localhost:8000/index.html and display:

Conclusion
Using the merges feature, we’ve been able to demonstrate a simple Cordova app that re-uses as much code as possible across two platforms, functions in the browser without errors, and has no platform specific if/else or switch statements in it.
Merges are great for working with platform specific images and CSS, and to a lesser extent for some JavaScript needs (platform specific configuration values would be a good example of where merges make sense for JavaScript / JSON files). For more complex JavaScript that needs to differ on a per platform basis, or which you want to share between multiple apps, we would recommend that you consider using a plugin.
If you’d like to try our completed test app out for yourself, it’s available on Github, and you can run it locally with a few simple commands:
$ git clone https://github.com/ModusCreateOrg/cordova-merge-example.git
$ cd cordova-merge-example
$ cordova prepare
$ cordova build
$ cordova emulate ios
$ cordova emulate android
$ cordova run browser
Hopefully you’ve found this exploration of a handy Cordova feature useful, and we’d love to hear if you plan to use it in your own apps. If you know someone who would find this article informative, please share it widely!
 Writing a Cordova Plugin in Swift for iOS