 Simon Prickett

Since the App Store first opened in 2008, developers wishing to build iOS apps have been required to learn Objective-C. This includes those choosing the hybrid model with Apache Cordova, as plugins that extend Cordova’s reach to include native APIs were also authored in Objective-C. For a long time this was the only language available for iOS development. Things changed in 2014, when Apple launched the Swift programming language at that year’s Worldwide Developer Conference.
(This post has been updated for Swift 3 and the latest Xcode tooling. If you’re using Xcode 8.2 or better, please check out my updated post instead of this one).
(This article originally appeared on the Modus Create blog).
Since then Apple has continued to evolve the Swift language, releasing a version 2 implementation and making it open source in late 2015. This has led to a lot of interest in using the language for native app development and beyond.
The Cordova hybrid application developer can continue to make use of the excellent off the shelf device API plugins that the platform ecosystem provides, but often the need arises to write a plugin that is project specific. Whilst the core app code that Cordova’s CLI generates continues to use Objective-C, developers can now choose between Objective-C or Swift when crafting their own plugins.
Let’s take a look at what’s involved in replicating the “ModusEcho” plugin that we built using Objective-C in a previous blog post. This time, we’ll use Swift for the native code.
To recap, this plugin borrows from the “echo” example in the Cordova documentation, and has two functions:
echo: Takes a string argument, displays a “Toast” (native dialog showing the message that auto dismisses after a short time), returns the string passed to it back to the caller.echojs: Takes a string argument, returns the string passed to it back to the caller, implemented entirely in JavaScript with no native code.
Initial Plugin Creation
As before, Plugman can help us get going by creating a plugin scaffold, much like the Cordova CLI does for a new app. We can create a new “ModusEchoSwift” plugin like so:
$ plugman create --name ModusEchoSwift --plugin_id com-moduscreate-plugins-echoswift --plugin_version 0.0.1 --path modusechopluginswift
This will set up the scaffold in modusechopluginswift/ModusEchoSwift. In that folder we can find the boilerplate plugin.xml that Plugman generated:
<?xml version='1.0' encoding='utf-8'?>
<plugin id="com-moduscreate-plugins-echoswift" version="0.0.1" xmlns="http://apache.org/cordova/ns/plugins/1.0" xmlns:android="http://schemas.android.com/apk/res/android"
  <name>ModusEchoSwift</name>
  <js-module name="ModusEchoSwift" src="www/ModusEchoSwift.js">
    <clobbers target="cordova.plugins.ModusEchoSwift" />
  </js-module>
</plugin>
Let’s change the clobbers element to make our plugin functions accessible to Cordova apps as modusechoswift.<functionName> by updating plugin.xml to look like this:
<?xml version='1.0' encoding='utf-8'?>
<plugin id="com-moduscreate-plugins-echoswift" version="0.0.1" xmlns="http://apache.org/cordova/ns/plugins/1.0" xmlns:android="http://schemas.android.com/apk/res/android">
  <name>ModusEchoSwift</name>
  <js-module name="ModusEchoSwift" src="www/ModusEchoSwift.js"
    <clobbers target="modusechoswift" />
  </js-module>
</plugin>
Having saved our changes, we can now look at the plugin’s JavaScript interface.
Implementing the Common JavaScript Interface
The initial JavaScript module www/ModusEchoSwift.js that Plugman created looks like this:
var exec = require('cordova/exec');
exports.coolMethod = function(arg0, success, error) {
  exec(success, error, "ModusEchoSwift", "coolMethod", [arg0]);
};
Let’s amend that to have a native echo method, and a pure JavaScript echojs method, as we did for our previous plugin:
var exec = require('cordova/exec');

exports.echo = function(arg0, success, error) {
  exec(success, error, "ModusEchoSwift", "echo", [arg0]);
};

exports.echojs = function(arg0, success, error) {
  if (arg0 && typeof(arg0) === 'string' && arg0.length > 0) {
    success(arg0);
  } else {
    error('Empty message!');
  }
};
As we would expect, there’s nothing Swift specific in the common JavaScript Interface (we’re calling the plugin “ModusEchoSwift” purely to differentiate it from our previous “ModusEcho” plugin), and we can now move on to native coding.
Implementing the iOS Native Code in Swift
As usual when creating a plugin, we need to edit plugin.xml to configure the package name and source file(s) that we will use to implement the native parts of the plugin for iOS.
Add the following to plugin.xml as a child of the <plugin> element:
<platform name="iOS">
  <config-file target="config.xml" parent="/*">
    <feature name="ModusEchoSwift">
      <param name="iso-package" value="ModusEchoSwift" />
    </feature>
  </config-file>
  <source-file src="src/ios/ModusEchoSwift.swift" />
</platform>
Note that because we’re using Swift, we only need one source file: ModusEchoSwift.swift. When working with Objective-C we would normally require at least one source (.m) file and one header (.h) file.
Your support helps to fund future projects!
We now need to create src/ios/ModusEchoSwift.swift which should contain the following code to implement the plugin’s native echo method:
@objc(ModusEchoSwift) class ModusEchoSwift : CDVPlugin {
  func echo(command: CDVInvokedUrlCommand) {
    var pluginResult = CDVPluginResult(
      status: CDVCommandStatus_ERROR
    )

    let msg = command.arguments[0] as? String ?? ""

    if msg.characters.count > 0 {
      /* UIAlertController is iOS 8 or newer only. */
      let toastController: UIAlertController =
        UIAlertController(
          title: "",
          message: msg,
          preferredStyle: .Alert
        )

      self.viewController?.presentViewController(
        toastController,
        animated: true,
        completion: nil
      )

      let duration = Double(NSEC_PER_SEC) * 3.0

      dispatch_after(
        dispatch_time(
          DISPATCH_TIME_NOW,
          Int64(duration)
        ),
        dispatch_get_main_queue(),
        {
          toastController.dismissViewControllerAnimated(
            true,
            completion: nil
          )
        }
      )

      pluginResult = CDVPluginResult(
        status: CDVCommandStatus_OK,
        messageAsString: msg
      )
    }

    self.commandDelegate!.sendPluginResult(
      pluginResult,
      callbackId: command.callbackId
    )
  }
}
Here, our class ModusEchoSwift subclasses CDVPlugin, which is provided by Cordova. If you’d like to read more about how to extend CDVPlugin, Cordova’s iOS Plugin Development Guide is an excellent resource.
For our plugin, we need to declare a single function echo that takes a parameter of type CDVInvokedUrlCommand, an object which represents the calling context and arguments from the Cordova webview to the native plugin code.
As is the case with Objective-C, our Swift plugin function needs to return an object of type CDVPluginResult so that the Cordova bridge can execute the success or error JavaScript callbacks, passing any return value from the native code back across the JavaScript / native bridge.
We initially assume the plugin is going to fail, and initialize a CDVPluginResult accordingly:
var pluginResult = CDVPluginResult(
  status: CDVCommandStatus_ERROR
)
Then we look for the message to display. This should be contained in the first argument passed to the plugin from Cordova, and if there isn’t one we fall back to an empty string:
let msg = command.arguments[0] as? String ?? ""
If the message exists (msg.characters.count > 0), we go ahead and display it using a UIAlertController, and reference to the Cordova app’s main view controller which we inherited through CDVPlugin:
let toastController: UIAlertController =
  UIAlertController(
    title: "",
    message: msg,
    preferredStyle: .Alert
  )

self.viewController?.presentViewController(
  toastController,
  animated: true,
  completion: nil
)
As we want to display the message for a short time then auto dismiss it asynchronously, we can use functions from Apple’s Grand Central Dispatch to execute the code that will dismiss our view controller after three seconds as follows:
let duration = Double(NSEC_PER_SEC) * 3.0

dispatch_after(
  dispatch_time(
    DISPATCH_TIME_NOW,
    Int64(duration)
  ),
  dispatch_get_main_queue(),
  {
    toastController.dismissViewControllerAnimated(
      true,
      completion: nil
    )
  }
)
If all of the above succeeds, we update our plugin result to indicate success and echo back the message that was passed to us:
pluginResult = CDVPluginResult(
  status: CDVCommandStatus_OK,
  messageAsString: msg
)
Then, we tell the Cordova app what the result of executing the plugin function was:
self.commandDelegate!.sendPluginResult(
  pluginResult,
  callbackId: command.callbackId
)
The plugin function call will return before the 3 seconds have elapsed, as we are dismissing our message dialog asynchronously. Cordova will handle calling the success or error JavaScript callback functions, passing them any data returned in pluginResult.
Creating a Bridging Header
The Cordova plugin that we have been working on is implemented in Swift, but the native parts of a Cordova iOS app are written in Objective-C still. Normally, this isn’t code that we need to be concerned with, as the Cordova CLI auto generates it for us along with an Xcode project to compile and build it.
When using Swift to write a plugin however, we do need to modify the Cordova app’s Xcode project settings to allow our Swift plugin code to access the Cordova objects that it needs, which are written in Objective-C. To do this, we make use of a bridging header file.
A bridging header file is an Objective-C header that contains imports for each Objective-C header that we want to be able to access in our Swift code. In our case, we need access to some of the Cordova objects: CDVPlugin, CDVInvokedUrlCommand and CDVPluginResult for example. This means that our bridging header just needs to contain:
#import <Cordova/CDV.h>
as our plugin won’t be using any other Objective-C references.
CDV.h contains declarations for all of these, and is part of every Cordova app that the CLI generates.
Our bridging header needs to live in the folder platforms/ios/<AppName> in our Cordova app (e.g. for our test app that we’ll build next this would be platforms/ios/TestApp). It also needs to be referenced in the Xcode project file so that Xcode knows that this is a bridging header and that the Objective-C app project also contains Swift code when compiling and linking the application.
In Cordova, the platforms folder should ideally be a build artifact — generated entirely by executing Cordova CLI commands. We should not be editing or adding files manually in this folder. However we now find ourselves needing to do so in order to insert the required bridging header into the Xcode project. Thankfully, Cordova’s CLI supports hooks that allow us to run scripts before or after certain CLI commands are executed, precisely to deal with situations such as this.
Hook scripts can be bundled up and distributed with plugins, making them easy to share and add to projects. GitHub user Alexis Kofman wrote a handy plugin that installs a hook script to automatically create the bridging header we need and configure the Xcode project to use it. His plugin can be found here and we’ll use it when configuring a test Cordova app to run our Swift plugin with.
For more information on mixing Objective C and Swift in the same project, we would recommend referring to the Apple documentation on the subject.
Testing the Cordova Plugin
Let’s generate a new Cordova app, add the bridging header generation plugin and our plugin to it, then test that everything’s working. To bootstrap a test app, use the following commands:
$ cordova create testapp com.moduscreate.testapp TestApp
$ cd testapp
Now let’s add the plugin that will install the bridging header for us, and add it to the Xcode project as described earlier:
$ cordova plugin add cordova-plugin-add-swift-support --save
And add the iOS platform to the project – we need to do this after adding the above plugin, so that its hook script is configured and ready to run.
$ cordova platform add ios
We can tell that the Add Swift Support plugin’s hook script ran and configured the project for us as it logged its changes when we added the iOS platform:
Adding ios project...

iOS project created with [email protected]

Discovered plugin "cordova-plugin-whitelist" in config.xml. Installing to the project

Fetching plugin "cordova-plugin-whitelist@1" via npm

Installing "cordova-plugin-whitelist" for ios

Installing "cordova-plugin-add-swift-support" for ios

Update IOS build setting SWIFT_OBJC_BRIDGING_HEADER to: /Users/simon/projects/modus/swiftplugin/modusechopluginswift/testapp2/platforms/ios/TestApp/Bridging-Header.h

Update IOS build setting EMBEDDED_CONTENT_CONTAINS_SWIFT to: YES
Now we can add our new plugin, using the relative path to its folder on the filesystem:
$ cordova plugin add <path/to/plugin>
e.g.
$ cordova plugin add ../modusechopluginswift/ModusEchoSwift/
Which should log:
Installing "com-moduscreate-plugins-echoswift" for ios
We can now check that our plugin was configured correctly by making sure our Swift file was correctly copied into the iOS app project:
$ find platforms/ios|grep ModusEchoSwift.swift

platforms/ios/TestApp/Plugins/com-moduscreate-plugins-echoswift/ModusEchoSwift.swift
Now we can go ahead and test build the iOS app:
$ cordova build ios
The app should build successfully. If the build finishes with errors, we will most likely need to edit the ModusEchoSwift.swift plugin file to correct them. One good way of doing this is to edit the source directly inside the test app project (it’s in platforms/ios/TestApp/Plugins/com-moduscreate-plugins/echoswift/ModusEchoSwift.swift), and rebuild the app. Once we have things working, we’d then manually copy the plugin’s Swift file(s) back to the plugin project’s own src/ios folder.
However, our test app still doesn’t use the plugin code yet as we didn’t change the generated “Device Ready!” boilerplate. To test the plugin within our app, we’ll replace the generated onDeviceReady function in www/js/index.js with the following:
onDeviceReady: function() {
  app.receivedEvent('deviceready');
  modusechoswift.echo(
    'Plugin Ready!',
    function(msg) {
      document
        .getElementById('deviceready')
        .querySelector('.received')
        .innerHTML = msg;
    },
    function(err) {
      document
        .getElementById('deviceready')
        .innerHTML = '<p class="event received">' + err + '</p>';
    }
  );

  modusechoswift.echojs(
    'Hello Plugin',
    function(msg) {
      document.getElementsByTagName('h1')[0].innerHTML = msg;
    },
    function(err) {
      document.getElementsByTagName('h1')[0].innerHTML = err;
    }
  );
}
Let’s run the test app again:
$ cordova build ios
$ cordova emulate ios
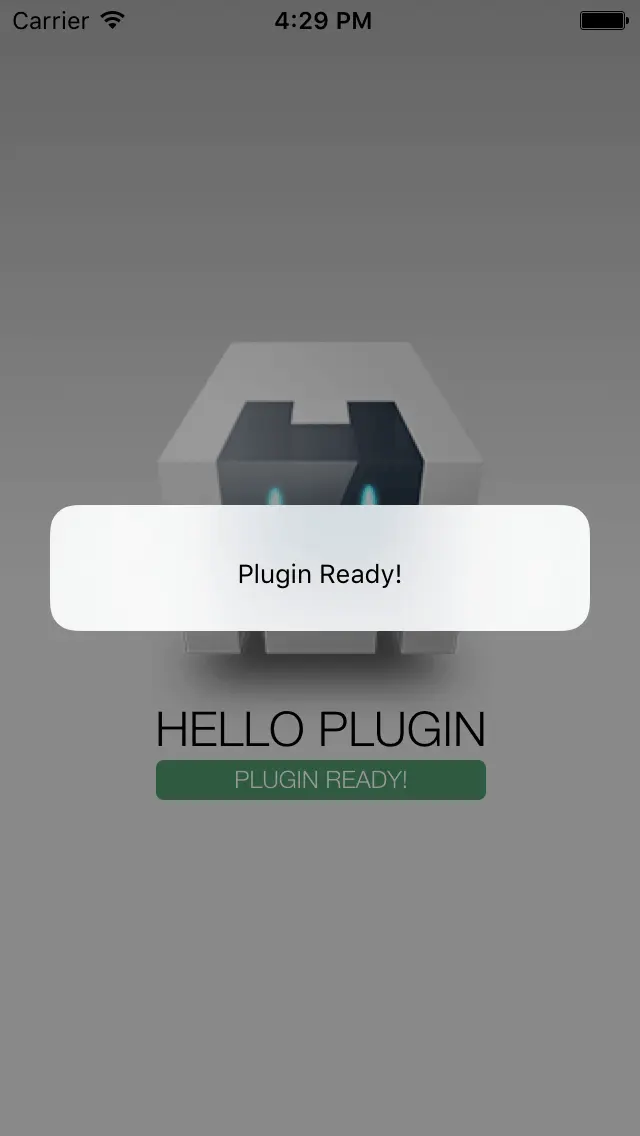
We should see “Plugin Ready!”, and a “toast” dialog pops up for a few seconds if the native code in the plugin is working. We should also expect to see “Hello Plugin” if the pure JavaScript function in the plugin works. A successful test of the plugin looks like this:
Conclusion
iOS developers building Cordova plugins now have a choice of either Swift or Objective-C for writing their native code. A single Cordova app can seamlessly make use of a mixed set of plugins written in both languages, so developers can choose which one makes the most sense for a given implementation.
As we have demonstrated here, developing a plugin using Swift is straightforward. The only overhead versus using Objective-C is the need to add the bridging header as the main Cordova app that Cordova CLI generates for us is still written in Objective-C.
If you found this useful, and you’d like to view the complete code for our “ModusEchoSwift” plugin, you can find it on GitHub.
Are you already using Swift to add native functionality to your Cordova hybrid apps, or currently considering doing so? We’d love to hear from you.
If you know someone who would find this article informative, please share it widely!
 Supporting the Browser Platform in a Cordova Plugin