 Simon Prickett
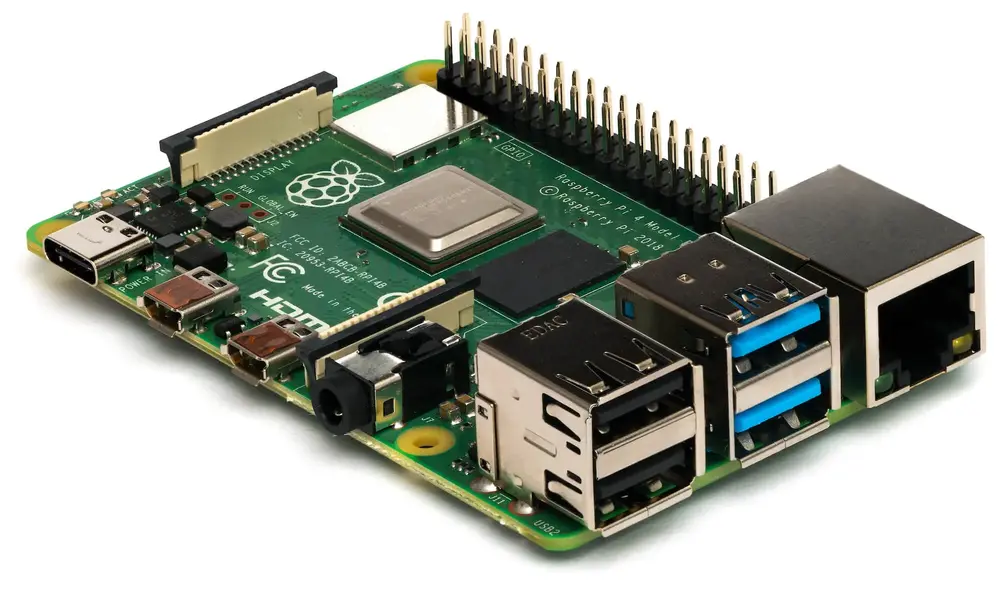
Launched in 2019, the Raspberry Pi 4 was a significant upgrade over previous models. With USB 3, gigabit ethernet, a faster processor, dual 4K HDMI display support and options for 2, 4 or 8Gb RAM it seemed to be breaking into the low end desktop computer space.
I’ve had a 4Gb Pi 4 since April, and haven’t really used it for too much yet. It had a stint as part of Balena’s Folding for COVID project then went back into the box for a while.
Fast forward to November and the Raspberry Pi foundation released the Pi 400, an all in one Pi 4 based computer inside its own keyboard. This got me interested in building up my own Pi 4 as a desktop computer, with the aim of using it as a workstation for future personal coding projects. As I’d want to leave it on my desk for extended periods and use it for hours at a time, I decided I’d need a case with active cooling to keep the dust and the temperature down. This article covers adding such a case to the Pi, and installing software that manages the fan and other features.
While looking at the Pi 400, I also realized that the Raspberry Pi Foundation also produce an official desktop kit with a base unit and separate keyboard form factor.
Shopping List
Here’s what you’ll need to build your own desktop Pi 4… as I live in the USA I’ve included links are for suppliers that ship from there and take payment in US Dollars. If you’re in the UK/EU, Pimoroni will have most of this stuff. If you need all of the components, it’s probably going to be cheaper to buy either the official complete desktop kit or the Pi 400 that I mentioned earlier. I already had everything except the case, so I stuck with the build my own route.
- Raspberry Pi 4 (I used the 4Gb RAM model, but there’s also an 8Gb).
- Appropriate USB C power supply for the Pi 4.
- Micro SD card (whatever size suits your needs, I used 64Gb and I like SanDisk products).
- Argon One Raspberry Pi 4 case with fan and power switch. I bought mine while visiting the UK, and got it from amazon.co.uk.
You’ll also want a couple of things you might already have:
- USB mouse.
- USB keyboard.
I used some older Microsoft products I had on hand. If you don’t have these, pretty much anything you can find will work.
Hardware Build
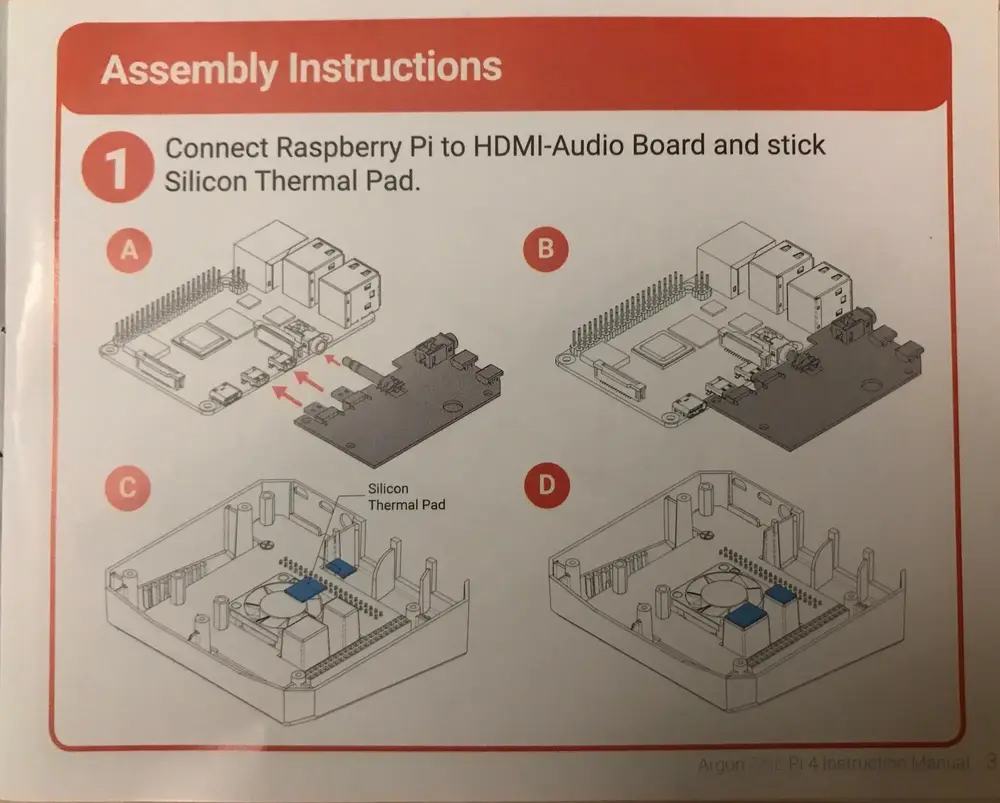
The case comes in kit form, and is straightforward to assemble - it even comes with a small screwdriver which is the only tool you need.
Your support helps to fund future projects!
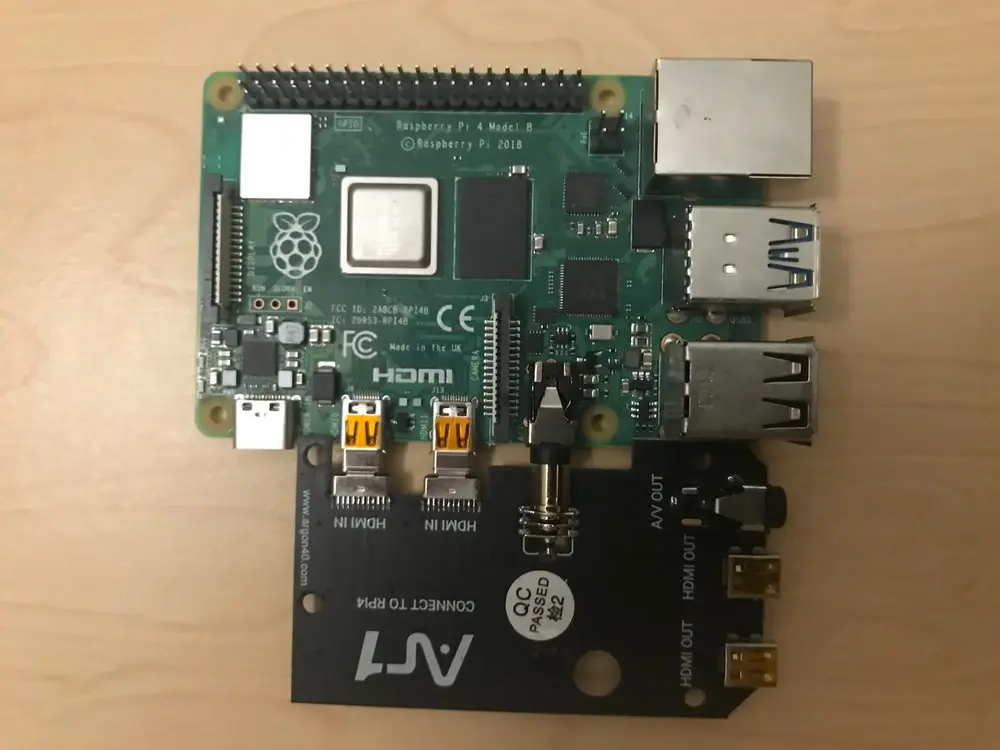
The instructions are clear and easy to follow. Check out the slideshow below to see the steps involved. There’s an expansion board that plugs into the Pi to relocate the audio and HDMI ports. The Pi then slots into the top of the case, connecting with it using the GPIO ports. The bottom of the case screws on, and helps secure the Pi inside. Finally, there’s a set of rubber feet to stick on the bottom.

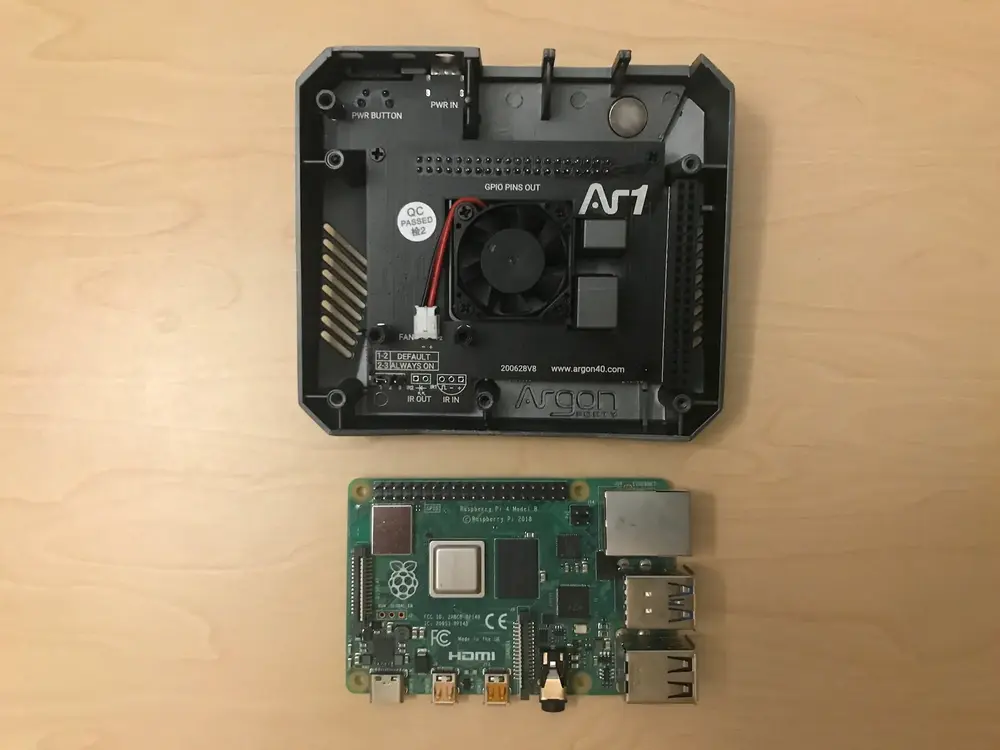

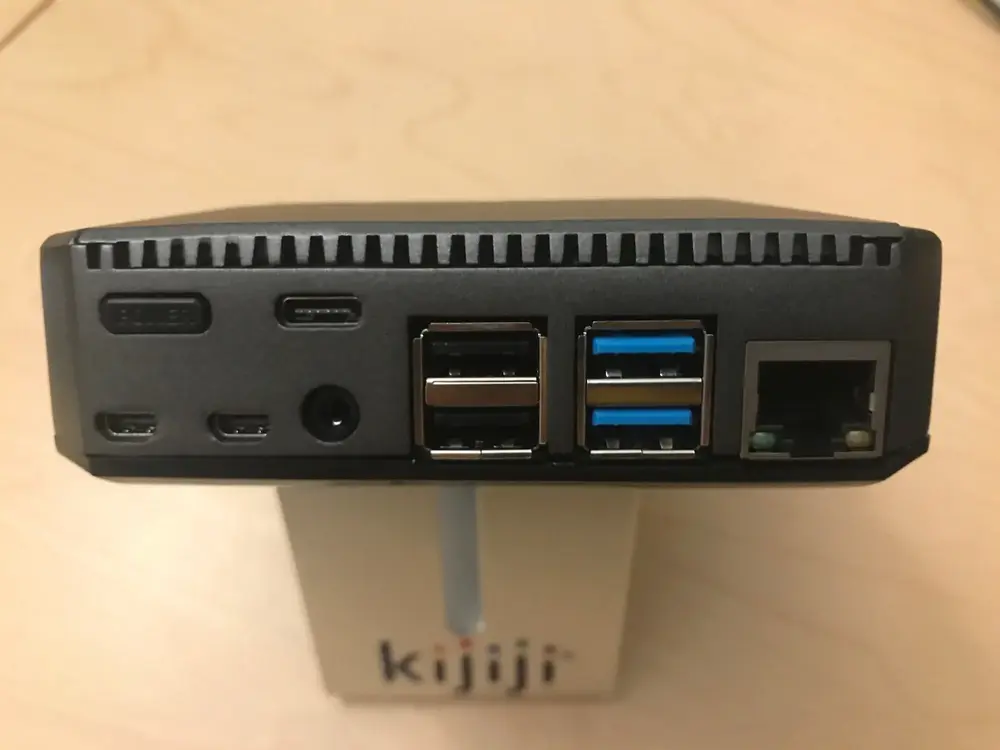
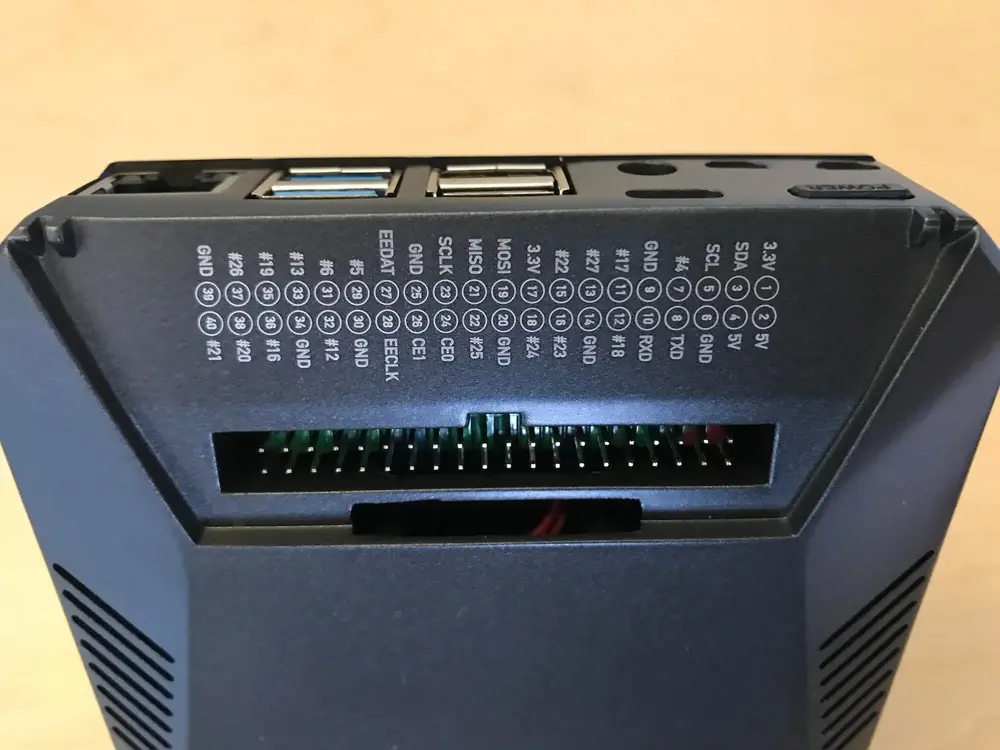
Having all of the ports on the back of the case is nice, it makes it look much cleaner than plugging things into three different sides of the Pi, and makes cable routing on your desk a lot easier.
The one potential downside I can see with this case is access to the GPIO ports. Having them brought out to sit under a magnetic cover on the top of the case is a really nice idea, and it’ll be easy to wire things to them. Fitting HAT type accessories will need a ribbon cable, and the HAT won’t sit flush on the Pi. This doesn’t concern me, as I wasn’t planning on using this particular Pi for tasks that require the GPIO ports.
If you need to connect the Pi camera while using this case, you can route its ribbon cable up and out the top by the GPIO ports. If using the Pi as a desktop, it’s more likely you’d want a USB webcam than the official Pi camera, and that would simply plug in around the back with everything else.
Operating System Setup
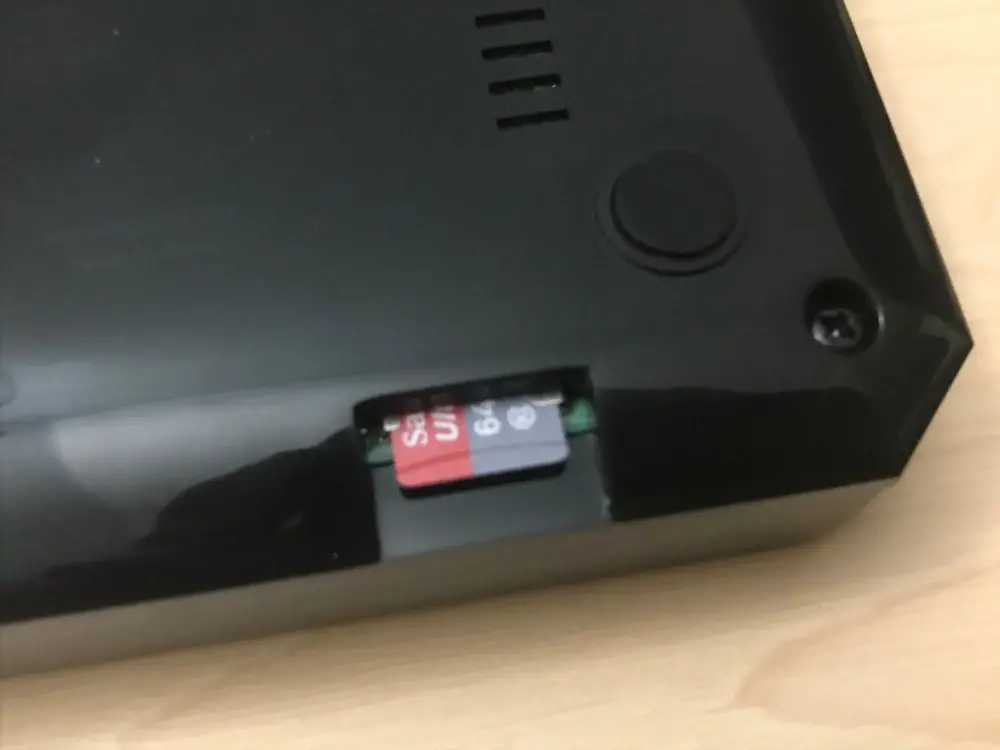
There’s nothing special to do here, just flash an operating system image onto your micro SD card and insert the card into to the Pi. The Argon case exposes the card slot underneath, making it easy to change cards as needed:
I used the official Raspberry Pi Imager to flash Raspberry Pi OS (Desktop version - not Lite) onto my micro SD card. The imager tool and OS images can be downloaded from the official Raspberry Pi site. Balena’s Etcher is also a great tool for flashing images to cards.
Power Button and Fan Management Software
Once you’re up and running with Raspberry Pi OS, it’s time to install Argon’s software that manages the fan and power button. Installation is really simple - a single curl command downloads the software and installs it. The default fan settings start with it running at 10% when the temperature hits 55 Celsius, stepping it up to 100% at 65 Celsius. I didn’t feel the need to change these, but several alternatives are available:
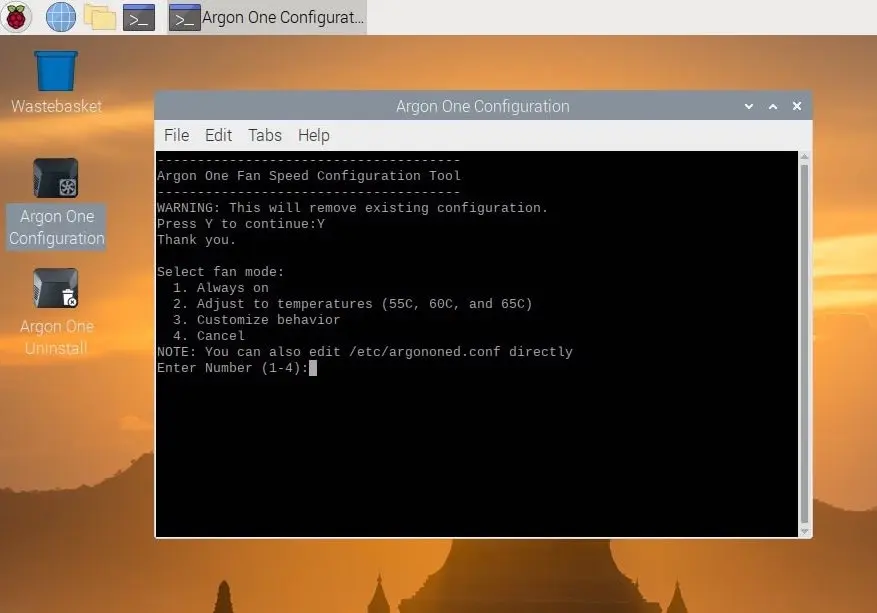
Installing the software also enables the Pi to respond to the power button on the back of the case. There’s a few options for shutdown – pressing and holding the power button for 3 seconds will shut the Pi down cleanly, holding it for over 5 seconds will force a shutdown, and a double tap of the power button initiates a reboot.
I don’t know if this package works on other operating systems that you could install on the Pi - Ubuntu for example - but it works well with Raspberry Pi OS.
Wrap Up
Here’s my Pi 4 in its new case, up and running as a desktop:
It’s early days to say much about the case, but I’m really pleased with it so far. Some reviews say the fan’s noisy… this is subjective but I don’t think it’s a problem based on my usage so far. Here’s a video showing it powering up, initially running the fan, and booting to the desktop environment in real time:
Now I have a Pi I can leave on my desk without fear of dust getting in it, and run for a long time as it’s got active cooling, I’ll aim to use it to develop future coding projects that appear on this site… and update this article with thoughts on how it performs in that role.
Main image: Michael Henzler / Wikimedia Commons / CC BY-SA 4.0
 Building a Visual Bloom Filter with Raspberry Pi, Python and Unicorn Hat