 Simon Prickett

Raspberry Pi recently released the Pico, their first microcontoller. This is a bit of a departure from their previous single board computers that cost a bit more, and run a full operating system. Think of the Pico more like an Arduino… you can program it in C or MicroPython and it runs your code and nothing else.
The Pi Pico has several GPIO ports that you can connect things to. Here, I’ll have a go at hooking up some buttons and LEDs to one and control them from MicroPython.
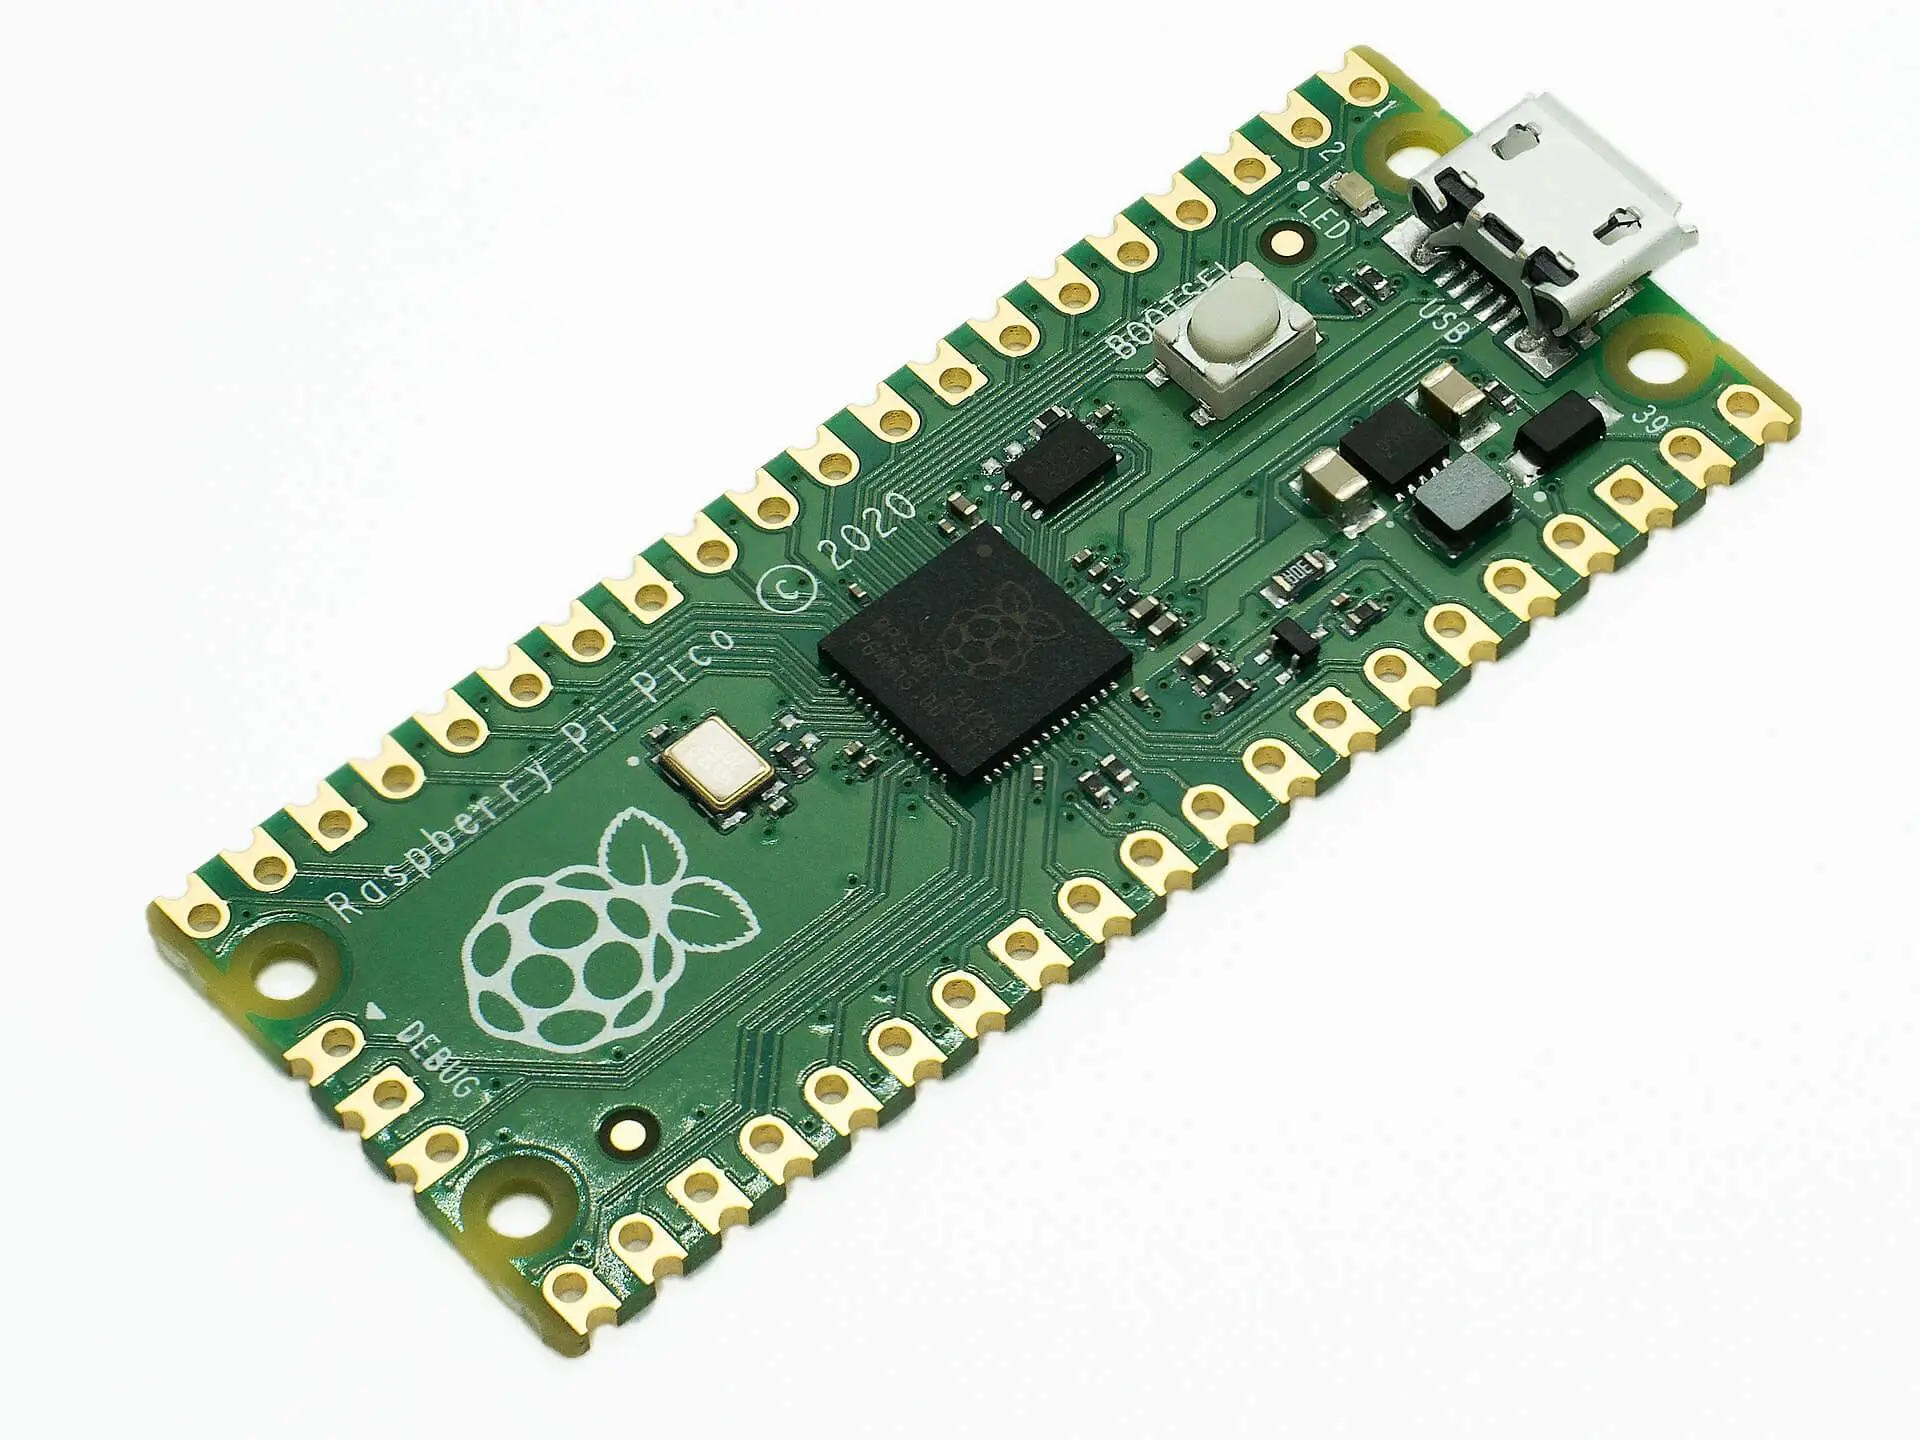
Here’s what the Pi Pico looks like:
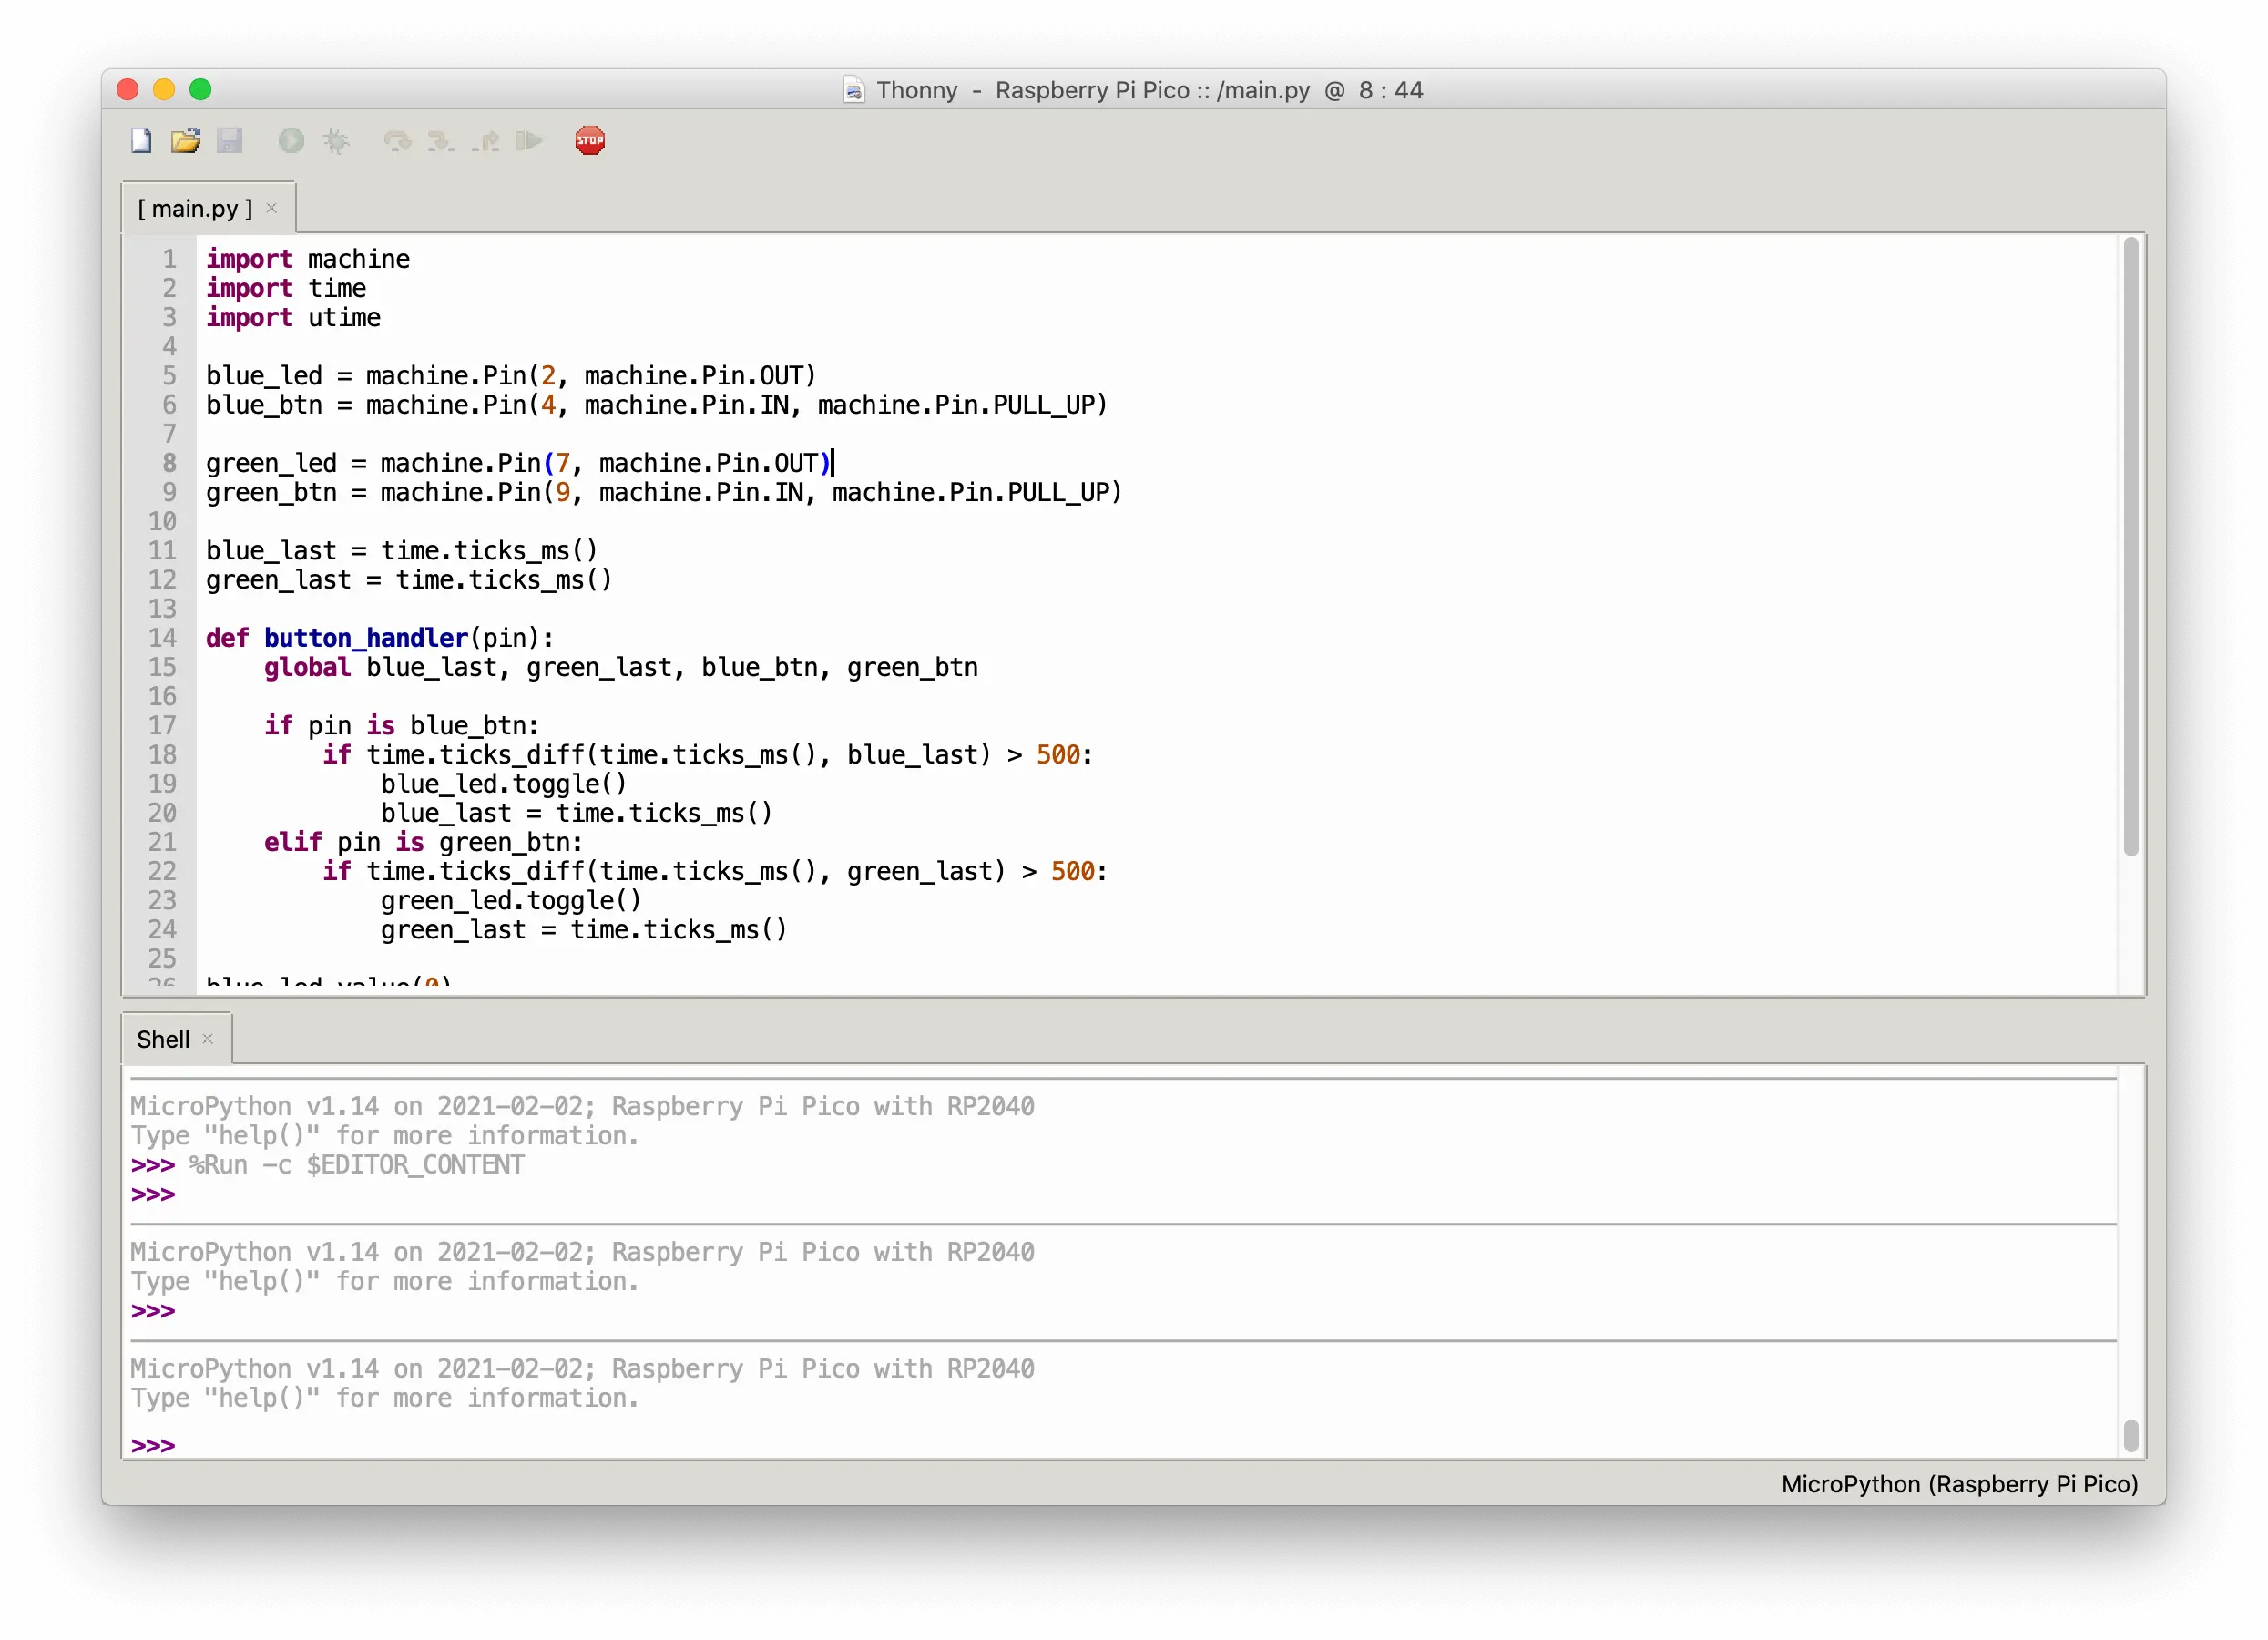
Programming is done by attaching the board to a computer using a micro USB cable. Thonny is the recommended editor - it can detect the Pi Pico and save code to it, as well as interface to the Python REPL on the board. Here’s what it looks like running on a Mac:
Thonny’s OK, but very basic. I’ll do some research into how to use an editor with more features in future… I’d prefer to use Microsoft’s VSCode which is my editor of choice at the moment.
Your support helps to fund future projects!
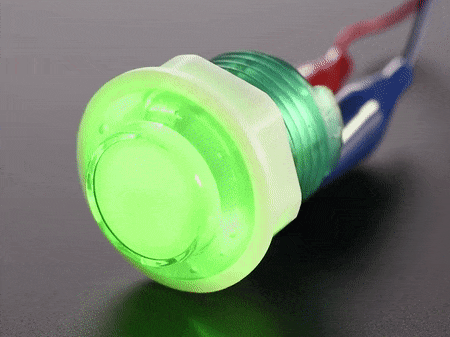
I decided it would be useful to learn how to control LEDs and detect button presses in MicroPython… this is the basis of a lot of projects you could use the Pi Pico for. I still love the Adafruit LED arcade buttons that are an input and output in one, so I got a couple of those and set out to write software that toggles the LED each time the button is pressed. Here’s what the buttons look like:
Note that the Pi Pico runs 3.3v GPIO, so you’ll want the blue and green buttons. The red and yellow ones need 5v and I keep forgetting that then wondering why they don’t work on Pi projects! (They work great on Arduino though).
And here’s what the finished project looks like, mounted in a cardboard box that I had to hand :)
Shopping List
Here’s everything I used to build this project:
- 1 x Raspberry Pi Pico (buy in UK / buy in USA).
- 1 x Adafruit 24mm LED arcade button green (buy in UK / buy in USA).
- 1 x Adafruit 24mm LED arcade button blue (buy in UK / buy in USA).
- 4 x Adafruit arcade button quick connect wires (buy in UK / buy in USA) - optional, just means a little less soldering but you could use the wire below for all connections. I used these for the button and LED connections on each button.
- Hook up wires, I like using single core ones (easier to poke through holes in circuit boards) but anything will do. I used these for the ground connections for each button. (buy in UK / buy in USA).
- Soldering iron (buy in UK / buy in USA.
- USB A to micro USB cable (for programming, then powering the finished project) (buy in UK / buy in USA).
- Cardboard box (you don’t need an enclosure, but it keeps everything together! I also find plastic take out food containers work well for this stuff).
Hardware
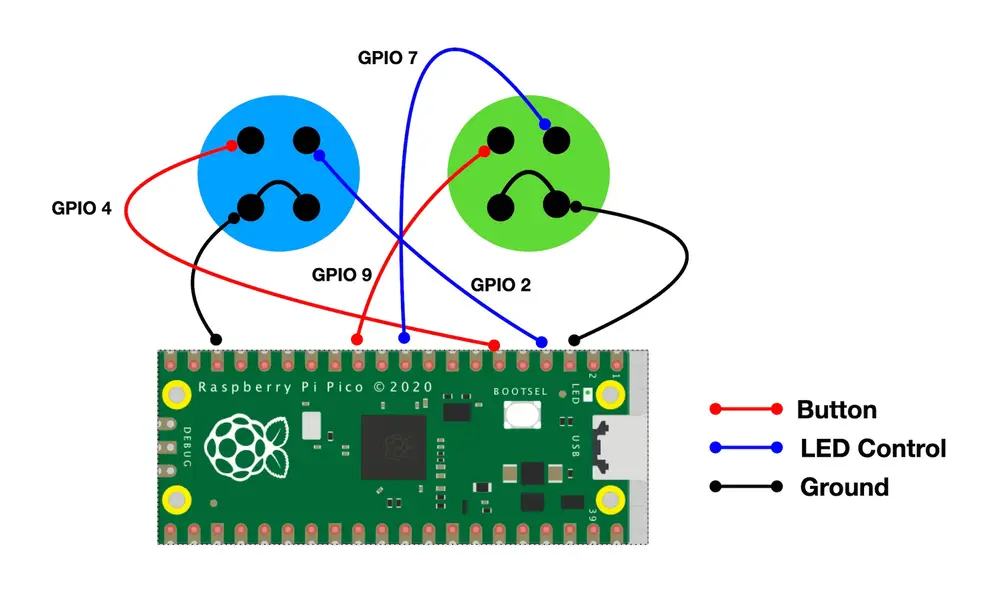
The buttons each have four connections… one is for the button feature, one powers the LED and the other two are ground. I needed to connect the button and LED connections to GPIO pins on the Pi Pico, and both grounds can be connected together than to the same ground pin on the Pico. Something like this:
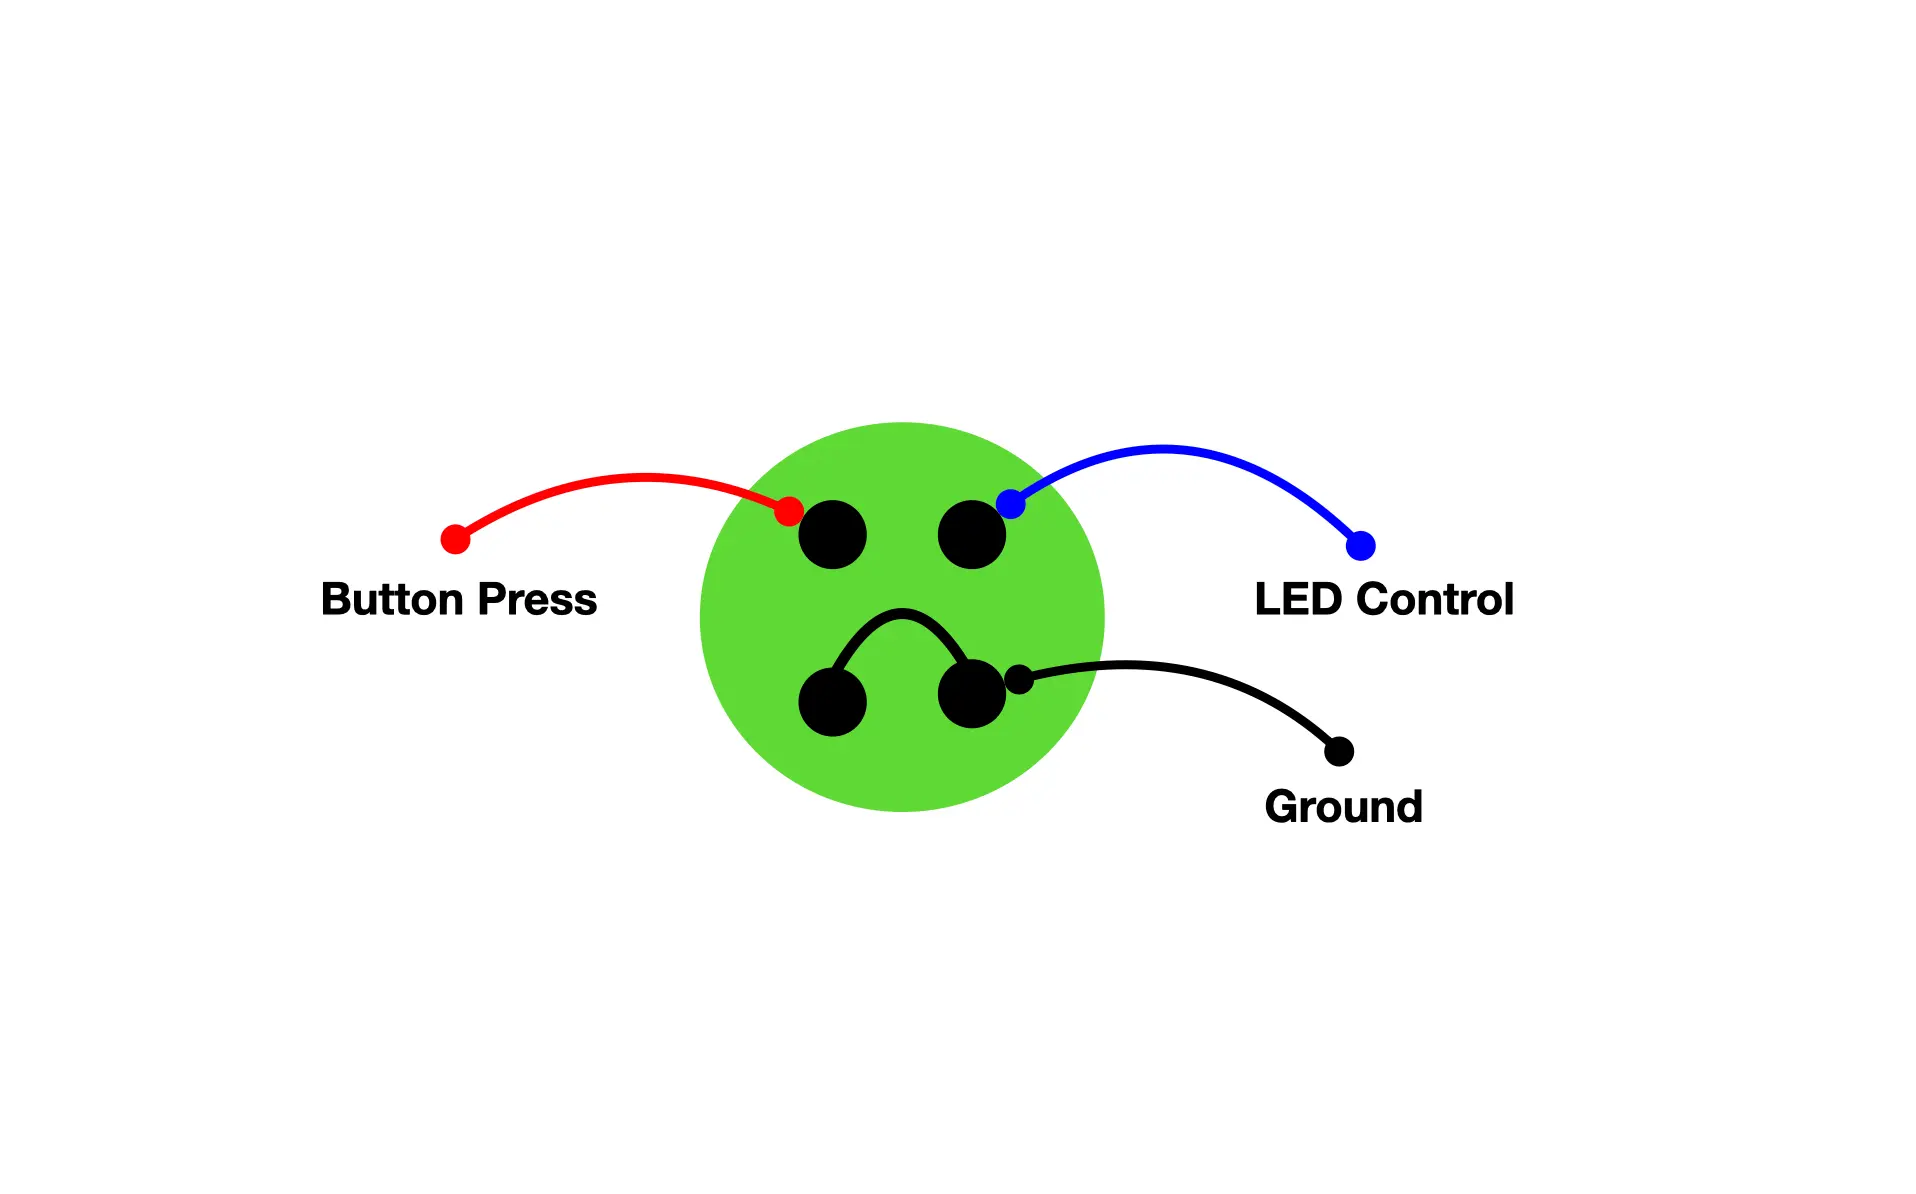
The overall wiring diagram looks like this… my choice of GPIO pins is pretty arbitrary, just remember to note down what’s wired to which pin as you’ll need that to make the code work :)
I’m always a bit nervous soldering these things up, as you’ve no idea if they’re going to work until the code’s written and installed on the board :) So, let’s get on with that…
MicroPython on the Raspberry Pi Pico
MicroPython needs installing on the Pico so that it can actually understand Python… This is relatively straightforwards and involves downloading a binary of the interpreter and loading it onto the Pico using the USB cable. If you need help with this, check out this guide.
Software
This was my first time writing anything with MicroPython, so I’m not going to hold this up as best practice but it works :)
The code to work with the GPIO pins is pretty similar to what I’d expect to use with Python on a regular Raspberry Pi, so I start by delcaring Pin objects for each LED and button. The LEDs are outputs machine.Pin.OUT and the buttons inputs - machine.Pin.IN. I set the pull up resistor on each of the button pins, to avoid false positive readings.
In the code beginning at line 26 I turn off each LED to begin with by setting the pin value to 0 (low), and assign the button_handler function to be triggered whenever the buttons are pressed.
The button_handler function runs whenever the buttons are pressed, and is passed the pin object representing the pin that detected the press. It checks which of the two buttons this is, and works out if enough time has passed (500 milliseconds) since the last time there was a button press detected. If so, this counts as a new button press. This mechanism acts as a rudimentary debouncer to make sure we don’t count the same press multiple times. If a new button press is deemed to have occurred, I toggle the LED pin’s state, which will switch the LED on or off.
Here’s the complete code:
Thonny provides an OK editor for coding, and makes saving the code to the Pico easy too.
Make Your Own?
This project doesn’t really do a heck of a lot, but it could be used as the basis of a game or something else… if you enjoyed this article and decide to do something with a Pico yourself, I’d love to hear about it. Feel free to take my code and use is as you please, it’s available from GitHub. If you’re looking for a more step by step guide to getting up and running with MicroPython on the Pico, I found this one at electronicshub.org very useful.
(Main Photo by cottonbro from Pexels).
 Dead or Alive - an Alexa Skill using Redis